Jun 30, 2018


 This dragon went through three Southern Oregon winters and was chipped and peeling flakes of red paint all over the walkway. I was so anxious to paint it with my new find, Unicorn Spit, that I forgot to take a before photo. But here he is in all his glory.

I highly recommend Unicorn Spit. It's non-toxic, can be opaque or transparent and has intense colors. Everything is getting painted with Unicorn Spit.


Jun 29, 2018

Tiny Weaving

 After trying to make my own tiny loom out of square embroidery hoops, foam core and cardboard, I ordered this fabulous little lightweight loom from Wool in the UK. Note the giant, flat-sided needle for weaving. This is a little miracle, this loom.

The first project is a rug for tiny shrine #2, The Shaman's Tipi. Here is the parts list again, since this project is stepping into the studio limelight after completing the Zendo.

cover
liner
threading pins
arrows
stack of wood
fire pit
rug - woven or felt
bed - fur (fake)
beaded bag
talking stick
pillows
blanket (woven or knitted)
back rests
walking stick
baskets
clay bowls
pots/hanging kettle
rattle
drum
pipe
smudge fan
sage wand
canoe


Jun 27, 2018

Making an Afghan, #2

 The next color. I pulled out 20 rows of this color after seeing a dropped stitch on the edge.

I keep repeating my Hobby Mantra, "No Hurry."

Note the two boxes of tools and parts for needle work. The peackock box is filled with threads for tiny weaving and the long art box has knitting needles and other knitter's paraphernalia.


Have you read back through this blog? If you, you've seen my Studio in a Basket posts. Studio in a Basket (in my living room) was a joke on me. I filled up that basket with yarn and projects in a few days. Now it's a studio in a basket and a big Laurel Birch bag and two boxes. Not to mention the tiny shrine series, filling up space in the real studio.

How do I have time for this and writing and editing and building shrines? What else should I be doing?


Jun 26, 2018

Cabled Afghan

There's a brief moment of overwhelm when starting a large project, but as soon as I remember my hobby motto, "No Hurry," I settle down. It's all about the knit and purl of it anyway, one stitch at a time. No deadlines, no money involved, just me, the knit and purl and a beautiful piece made at the end of a long off and on meditation.

My Goddaughter picked out the yarn. Her colors are bold and the yarn is washable worsted weight wool blend, very easy on the hands and skin while knitting.

These cables are based on ten stitches and ten rows and the afghan is built out of 60 stitch panels of each of the four colors. With any luck, this afghan will be about 54 inches by 60 inches, enough to cover two snuggly people.


Jun 25, 2018

Jun 22, 2018

Printable Fabric


 Leftover from another project, I have packets of 8.5x11 sheets of printable fabric from Dharma Trading Co. in San Rafael, California: several grades of cotton, muslin and silk. These banners were printed on Haboti silk for tiny scrolls.


I am already imagining the tiny prayer flags fluttering on the Tibetan Buddhist Shrine.


Jun 18, 2018

The First Shrine #6

It's amazing, when those inspired moments happen and you just know you have the right tools, ingredients and materials for a particular project.

The first funky teahouse, built with single walls out of popcicle sticks and cut with scissors and an Xacto knife, looks exactly that funky. It's so funky, David made me take one of the pictures down.

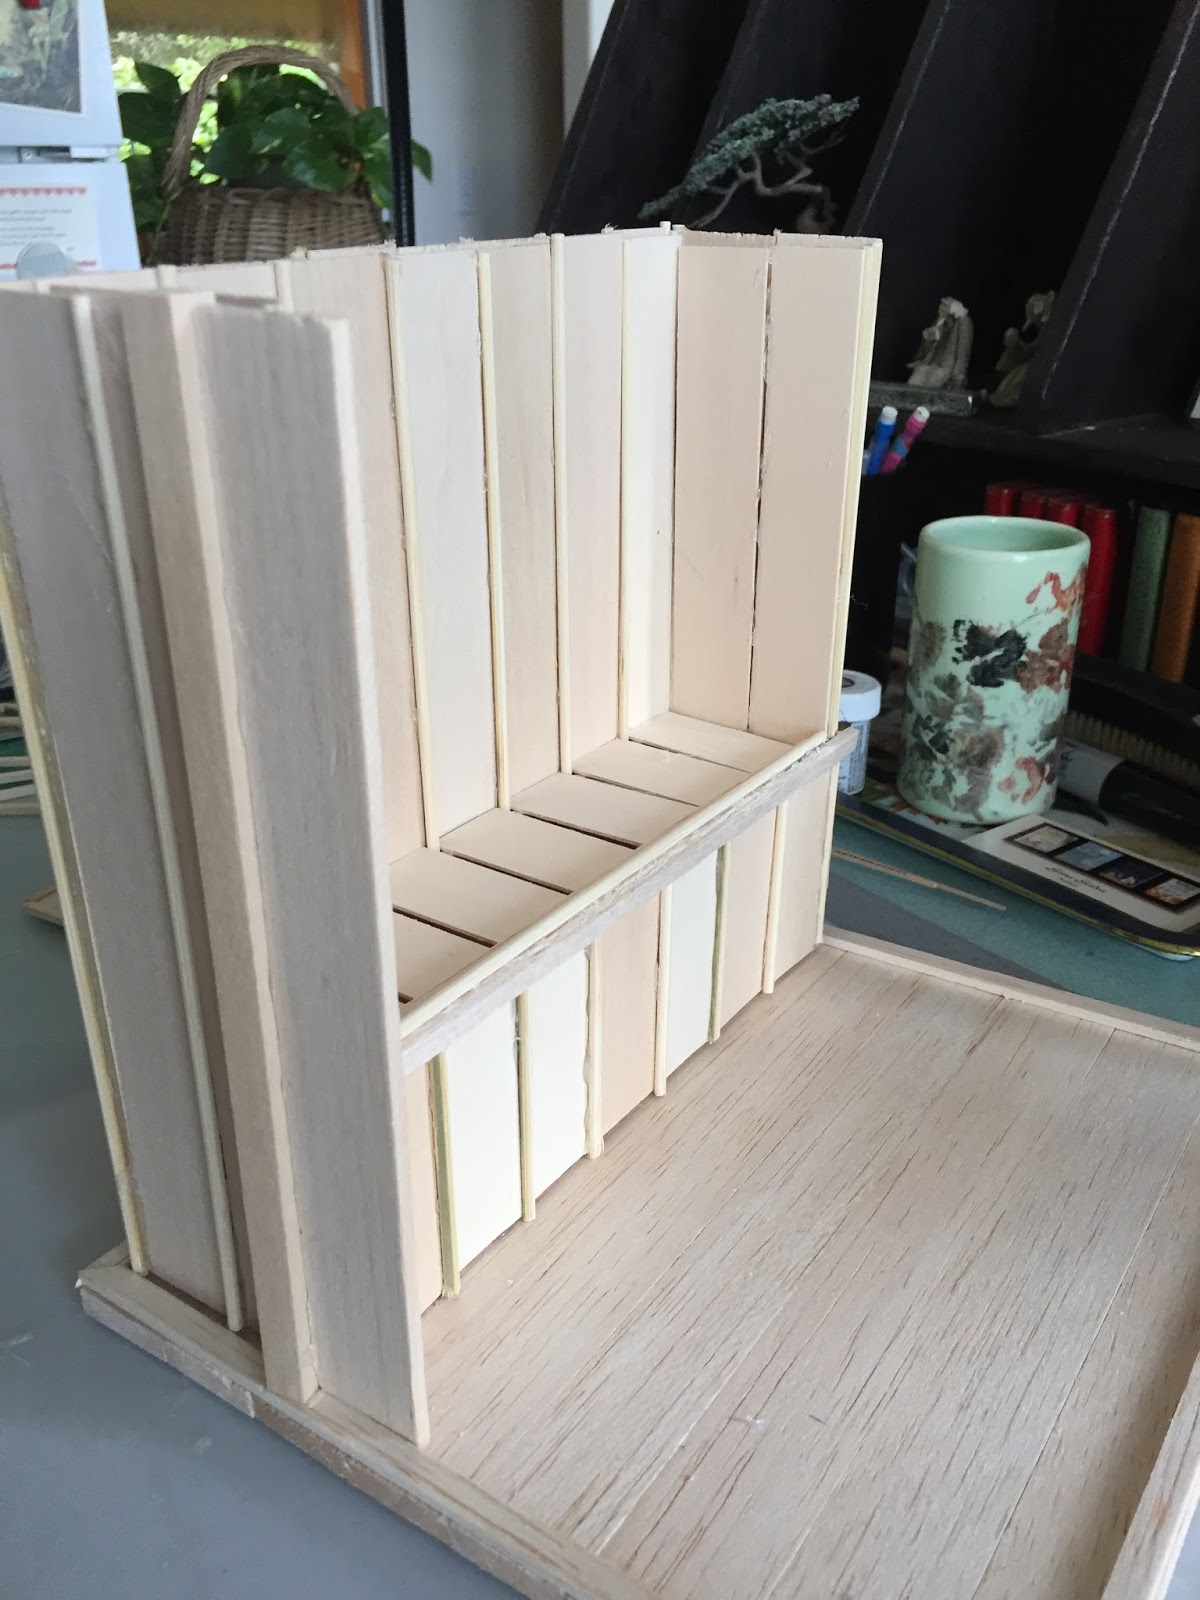
Thanks to better tools (the tiny Xacto miter box and three tiny saws), better materials (tiny Basswood and Balsawood lumber), not to mention a higher skill level (the artist having discovered double wall construction in small scale building), my Zen Shrine has stability.

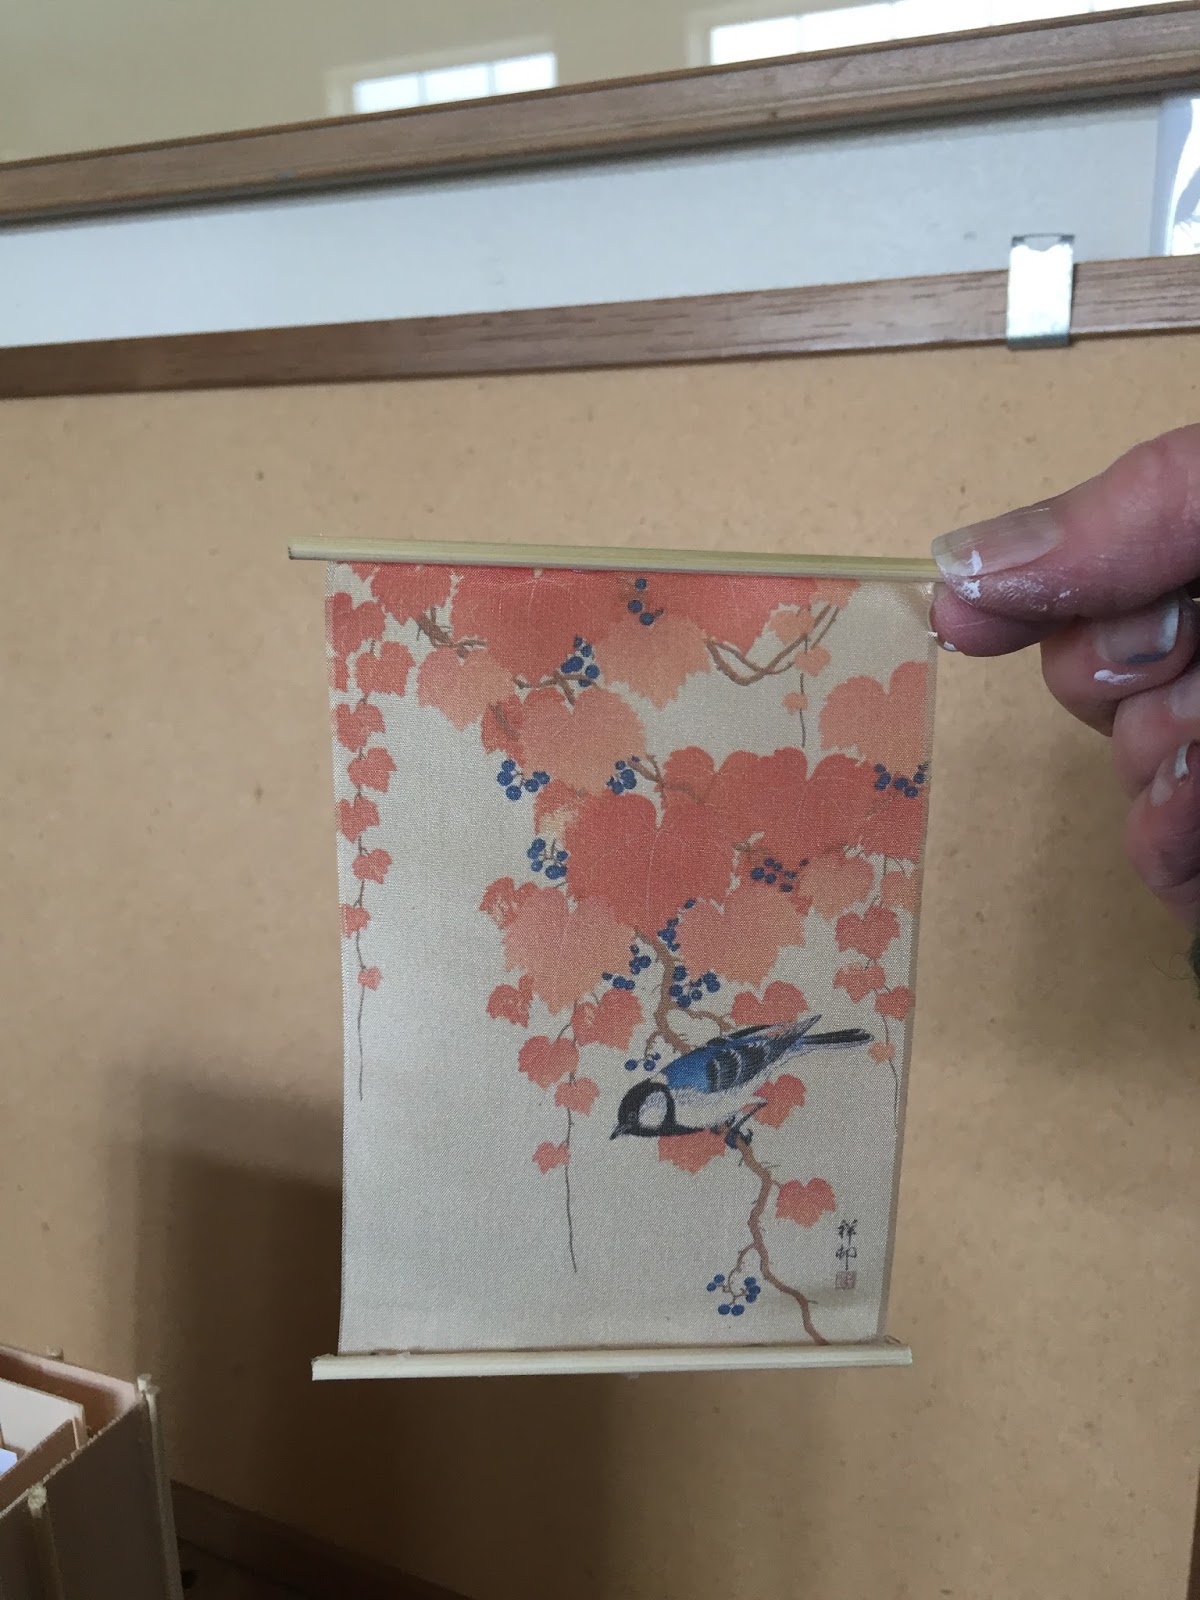
I discovered that tracing paper makes a good substitute for rice paper and I can print bamboo on it with my Canon printer. This was a magical moment - when I realized I did not have to dig out my Sumi-e painting tools and grind some ink in order to get the bamboo effect on those shoji screens. I also printed tiny silk banners on Dharma Trading Co.
printable, paper-backed Haboti silk. More about that in the next post.

There is a lot of trim still to do, a see-through roof (perhaps with a glass skylight for better interior viewing) and a little tiny paint job on that platter and the lantern.

Overall, I am happy with the tiny Zen Shrine, so far.


Jun 12, 2018

First Shrine #5

 I originally planned to have sliding shoji screen doors, like in the Japanese Teahouse, but decided to fix the walls and to keep the visibility to the inside open - once the roof goes on, the inside will be much leas visible.

In building this structure, I keep in mind Tassajara Zen Center, where I first studied Zen meditation in 1972 and bought one of the first spiritual books of my collection, Zen Mind, Beginner's Mind, by the founder of the Zen Center, Shunryu Suzuki, which I am reading again now.

At Tassajara, the rooms and meditation hall are simple, clean and free is distractions.


Jun 8, 2018

The First Shrine #4

 In building the first practice piece, when I copied the YouTube Video about how to build a Japanese Teahouse by AkameruKawaii, the first thing I learned was: I did not want to build my shrines out of popcicle sticks and coffee stirrers.

After a disastrous attempt at staining popcicle sticks with red ink, which warped the tiny "boards" and made my next little practice structure look more like an outhouse than a place of contemplation and solace, I watched a wonderful video of a contractor building a 1/12 scale model of his home. His model covered a 4x8 foot piece of plywood, very impressive. I built a practice piece using double wall construction.

The first real piece in the series, the Zen Shrine, is underway. Here are the shoji walls under construction. Instead of popcicle sticks and coffee stirrers, I have developed a tiny lumberyard. Here I have tiny boards, trim and bamboo skewers (which I thought were OK, considering this is a Japanese Shrine).
 
Instead of a backroom for a teahouse, I built a tiny altar. Now, the wall are going up, which will be lined in "rice paper" painted in a bamboo motif (actually tracing paper on which I printed a black bamboo image).


Jun 4, 2018

The First Shrine #3


 In this first picture, I have just added the trim board that will hold up the altar shelf surface. I used craft sticks for the shelf and trimmed everything in skewers, which can be used as tiny dowels. It is a very simple design, very Zen, I think.

Meanwhile, I made a series of little terra cotta platters and bowls for both this shrine and the Shaman's Tipi. The platters will be painted in the style of each culture. Notice the tiny lantern on the right.

Next will be the six little shoji screen walls that create the room around the altar.