Showing posts with label DIY. Show all posts

Feb 19, 2019

Tibetan Temple #3

I rediscovered polymer clay after a 20 year hiatus. Back in the early 90s, I made beads and pins and jewelry items.

This time around, I had in mind the tiny lumberyard and all my little itty bitty constructions. For the Zendo, I formed a little platter, a bowl and a vase. In the midst of the experiments, I fell in love again with this versatile medium. There are a bunch of useless polymer items around my studio right now,  a giant red flower, some art deco pillars, on the way to making tiny creations for the Tibetan Temple:

Here is the tiny tile floor, made from a large sheet of polymer clay, conditioned and rolled out to accommodate my 7x7 inch plan. After baking, I cut out the corner tiles to make room for the 1x1 inch pillars.

The wood base for the temple is three sheets of basswood glued together and framed in around the tiles.

I was attracted to Buddhist teachings because of the three essentials: (a) ethical conduct, (b) mental discipline and (c) wisdom. Along the way, I learned about making malas (another post) and painting as a meditation.

While studying Thangka painting, mental discipline was necessary, as was patience with myself and for the slow emergence of anything resembling a Buddha.

This little tile floor will be painted blue, the base stained with red.

The miter box lessons from my son, Michael, come in handy with my tiny tools. I am pretty happy with my corners.

Tulku Jamyang and his wife, Chigme, invited me often to share their Tibetan dinners. It was all very mysterious to me, big bowls of chopped meat, tureens of thick soup, flat breads and sweet pastes and sticky rices. We ate heartily with fat spoons as well as our fingers and drank copious amounts of rich dark tea with coconut butter (no yaks for miles and miles).

When I work out my Tibetan Temple, I remember Tuklu Jamyang's teachings, and translate the sacred geometry into my constructions.

I have become more patient over the years through meditations of all kinds, other art forms, knitting, of course, but the memory of Mondays with Tulku Jamyang, his quiet teachings, his generous spirit, hover around me like a sprite.

As I teach myself to sculpt with polymer clay, I'll make a teacher, a student and a Buddha.


Feb 16, 2019

Tibetan Temple #2

From The Once and Future King by TH White:

“It is God who keeps the price secret, Uther. Not I.”

“God? God? What god? I have heard you speak of so many gods. If you mean Mithras...”

Says Merlin, “Mithras. Apollo. Arthur. Christ. Call him what you will. What does it matter what men call the light? It is the same light, and men must live by it or die. I only know that God is the source of all the light which has lit the world and that his purpose runs through the world and passes each one of us like a great river and we cannot check or turn it but can only drink from it while living and commit our bodies to it when we die.”

God is in the details. Of everything. And the Light.

The Shrines to the Divine project began in early 2018. I have cataloged here in the blog the process of the first little tea house and the final Japanese Shrine, the Zendo, both built in 2018.

Along the way of my life, I have had the privilege to study with, cook for and generally be around some lovely teachers, in the name of art, or food, or spiritual advice. I have sat at the feet of gurus, pranced around the fire as a deer with a Huichol shaman on Mt. Shasta, meditated on Paramahansa Yogananda's houseboat with Steven Seagal, studied with and fed Deepak Chopra and myriad other pop culture stars, looked at Tibetan Buddhism through the eyes of the Thangka painting monk, and cooked for large groups at a retreat center while spending my nights in a 400 square foot tipi. Alison Stillwell Cameron lived next door to my mother and sparked my interest in Chinese Sumi painting, my bookbinding instructors shared Japanese print making, Shibori fabric design, marbled papers and so much more.

I feel closest to the source of all the light when I am being creative.

The top image above floated across my Facebook timeline, posted by a friend. It is an art deco painting by Vittorio Zecchin who died in 1947. Look him up. He blows my mind. The Dominican nuns never showed us his paintings in Art Appreciation class.

When I saw this painting, not just the goddesses themselves but the intensity of the colors hit me like a whack in the chest. The moment pushed me into the long talked about Tibetan temple, because I had to get involved with those colors.

As a dedicated DIY nut job, I set out to make some fabric for the backdrop to the buddha's throne. Although I used red and gold on black in my first draft of the fabric pattern, the colors of the shrine with mimic those above in Zecchin's: orange and purple and violet ...with some red.


I took a photo of the finished 12 x 12 canvas and shrunk the design to the size of a postage stamp, repeated the pattern to fill an 8.5x11 sheet of paper-backed silk for printing, and voila!


A tiny silk curtain of my own design.


Aug 9, 2018

Jun 25, 2018

Jun 22, 2018

Printable Fabric


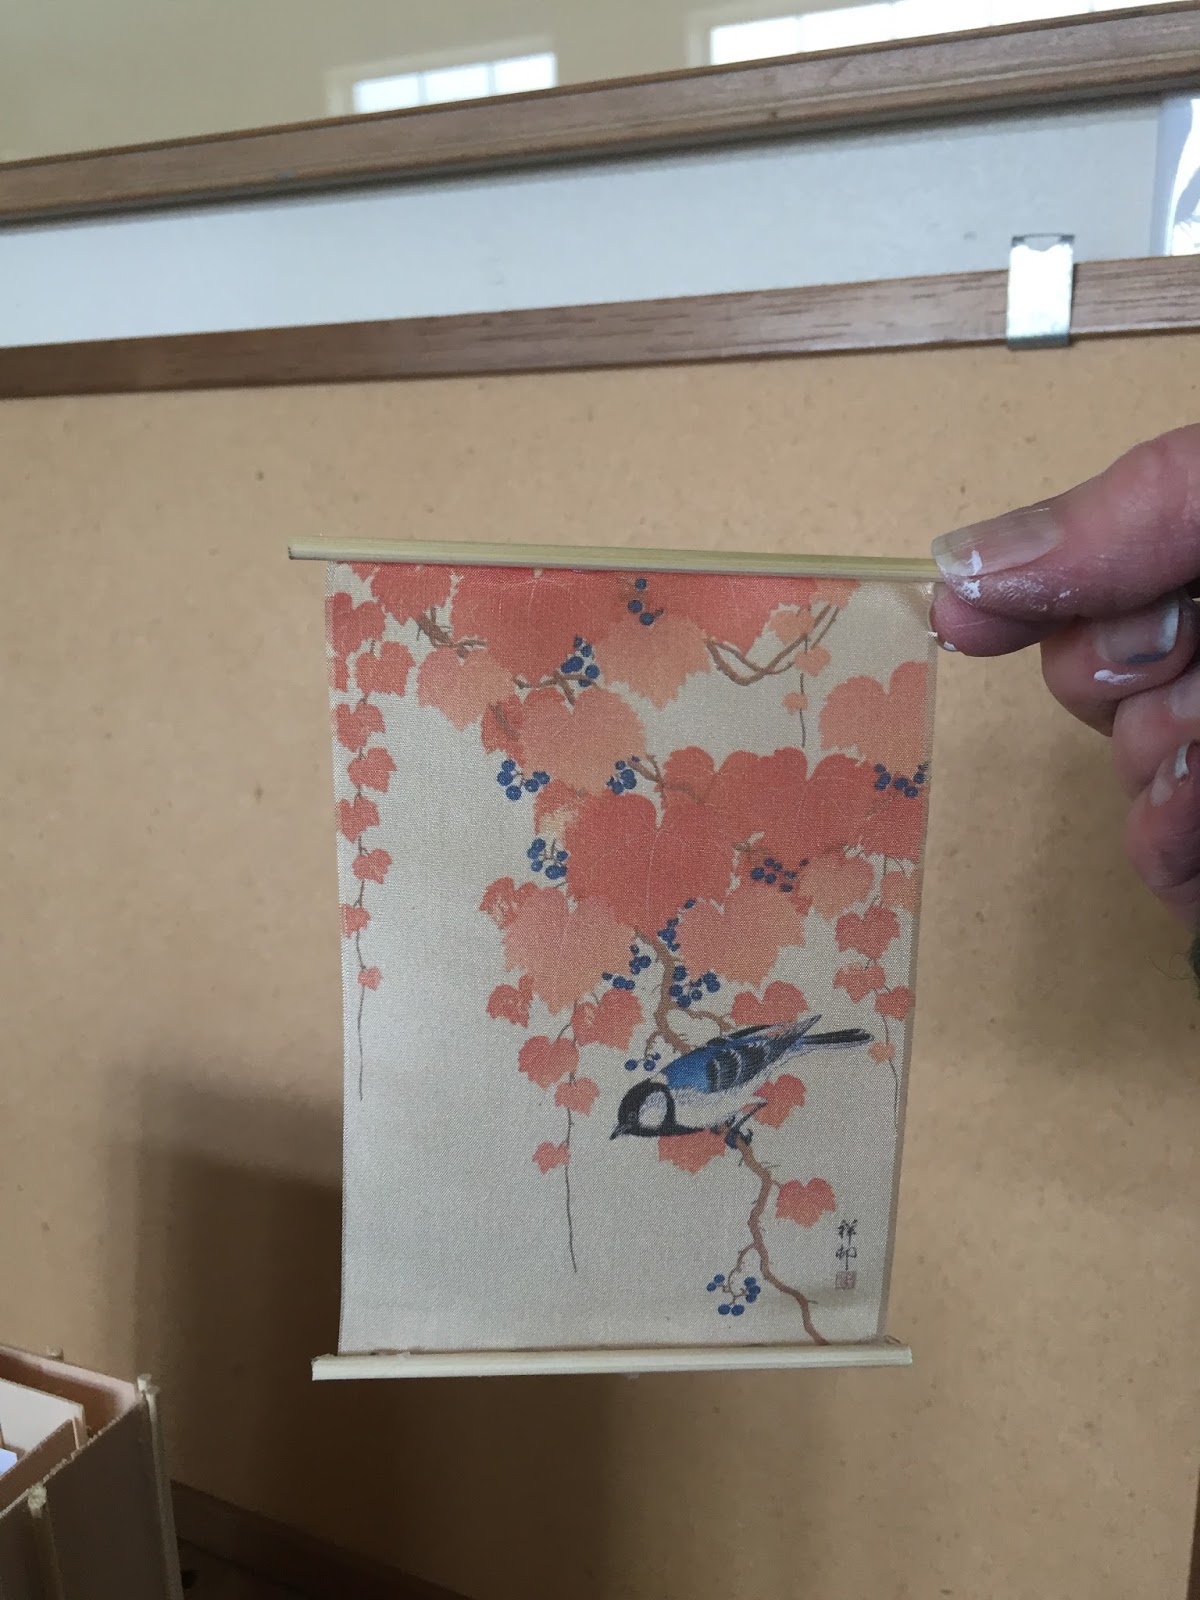
 Leftover from another project, I have packets of 8.5x11 sheets of printable fabric from Dharma Trading Co. in San Rafael, California: several grades of cotton, muslin and silk. These banners were printed on Haboti silk for tiny scrolls.


I am already imagining the tiny prayer flags fluttering on the Tibetan Buddhist Shrine.


Apr 11, 2018

Making Stuff - Japanese Tea House, Part 3

 I made these shoji screen doors entirely out of coffee stir sticks which cut easily with scissors. Instead of rice paper I covered the doors in muslin fabric.

Today I received a tiny Xacto miter box in the mail, as if by magic (thank you, David). While I await the tiny Xacto saw, expected on my doorstep Monday evening, I ponder and compare this experience to building Faerie Junction with my pals last spring.

First of all, my pals aren't here.

Secondly, our faerie scale was, "Whatever - just tiny. It's faeries."

Here, the measurements are a bit more precise. I want those corners perfect! I want those shoji screens to slide! Before I make my next cut (abashedly I admit to currently cutting with scissors and Xacto knives) I will have that little saw in my hand.

Next, I'll be making the sliders and  the roof. I want to put a tiny ceramic pot over a tea light for essentials oils. We'll see if the concept works. Stay tuned.


Mar 1, 2018

A Simple Scarf Project

This scarf is a great project for a beginner. It is done with a garter stitch all the way (knit, knit, knit forever) except for a little bit of checkerboard (knit four, purl four) until the right length. Just add on whatever colors you like. I used Merino Extra Superfine washable wool with size 7 needles. I  cast on thirty stitches and made it just long enough to lay comfortably across the chest, by request. It’s a soft, cozy beauty.

GB's Love Notes

Writing notes is an art lost to the generations after boomers. It's quicker to send an email, or even a text. Or, perhaps a wave and a "Thanks!" on the way out the door is enough.

My mother was a perfectly imperfect human in many ways, and I have forgiven her, in absentia of course, for all the weird things she did, like make me wear tunics to school in the 7th grade to cover up my well developed you know whats.

But she was a class act. I say it that way because it was one of her pet peeves. She thought that if you had to mention it, you weren't. But, she was.

She drilled mega doses of manners and niceties into me that I cannot ever discard or let go. I thank her for things I take for granted:

knowing how to set a table
chewing with my mouth closed
opening doors for others
honoring elders
leaving a place better than when I found it
and
the art of the thank you note.
I supppose I have to thank the Dominican Nuns
for teaching me cursive writing, even if they did try to make me right handed.

I'll thank my father, while we're at it, for teaching me the art of inquisitiveness and a love of words.

In an earlier post, I mention the Studio in a Shoe Box of my childhood, filled with paper dolls, valentines and tiny plastic scissors. The box is bigger today, but the idea is the same: be prepared.


 These envelopes were made from a 4x6 template from old books, magazine and songbooks.


Feb 26, 2018

The Whole 30 Update

The hardest part of the Whole 30 is breakfast. Now that I have added another 30 days without eggs, harder than ever.

The first thing I do is think of all the folks who didn’t get breakfast this morning. OK, this is not hard.

Then, I think of what I might order for breakfast when I go out. Air.

Then, I concoct some unusual thing. Today, Kitchen sink veggie hash with carrots, sweet potato, celery and asparagus, sautéed in ghee. A little salt and pepper. Mmmmm.

Yesterday: Whole 30 compliant chicken sausage and cooked apples.

New idea: when I come home from the market with bags of veggies, prep them for use right away. Then, no excuses. It’s still fridge full of ingredients, but, particularly at breakfast time, I need all the help I can get.

Today’s Added Value:

Oven Roasted Sugar Free Tomato Ketchup

4 cups fresh chopped Oven Roasted Roma Tomatoes*
1/2 cup water
3/4 cup distilled white vinegar
1 teaspoon finely minced white onion
1 clove garlic, finely minced (or juiced)
1 teaspoon salt
1/8 teaspoon celery salt
1/8 teaspoon hot mustard powder
1/4 teaspoon finely ground black pepper
1 whole clove

Chop cooled tomatoes anyplace in a three quart saucepan.
Add vinegar, onion powder, garlic powder, salt,
celery salt, mustard powder, black pepper, cayenne pepper,
and whole clove; whisk to combine.

Cook on low, uncovered, until mixture is reduced by half
and very thick, about an hour.

Smooth the texture of the ketchup using an immersion
Blender for about 20 seconds. Ladle the ketchup into a fine
strainer and press the mixture with the back of a ladle to strain
out any skins and seeds. Transfer the strained ketchup to a
bowl. Cool completely before tasting to adjust salt, black
pepper, or cayenne pepper. Refrigerate.

Oven Roasted Tomatoes

30 firm but ripe Roma tomatoes
Olive oil
About a teaspoon each of thyme,
rosemary & oregano
Kosher Salt

Slice tomatoes in half lengthwise. Place cut side up on 2
Parchment-covered sheet pans. Drizzle liberally with olive
oil. Sprinkle with salt and herbs. Place in 200! oven for 5-8
hours, depending upon the degree of dryness desired. The
idea is to simply dry out the juices. If you go too far, the
tomatoes get leathery. The perfect dried tomato will have a
consistency much like sun-dried tomatoes.


Feb 23, 2018

Veggie Stock

Clear Vegetable Stock

Makes 4 quarts

2 carrots, cut in large chunks
3 celery stalks, cut in large chunks
2 large white onions, quartered, skins on
1 head of garlic, halved
1 each rutabaga, parsnip, turnip, halved
2 bay leaves
1 teaspoon salt
4 quarts water

Brush and clean the vegetables and place in a large
stockpot over medium heat. Add about 4 quarts water. Toss
in the bay leaves and salt and allow it to slowly come to a
simmer. Lower the heat to medium-low and gently simmer
for 3 hours, partially covered.

Carefully strain the stock through a fine sieve into
another pot to remove the vegetable solids. Use the stock
immediately or if you plan to store it, place the pot in a
sink full of ice water and stir to cool down the stock. Cover
and refrigerate for up to one week or freeze in containers.

Dark Vegetable Stock

Makes four quarts

Use this stock when a deep color and strong, smoky
flavors will enhance the recipe, like a vegetarian version
of French Onion Soup. It can be kept for up to 5 days in the
refrigerator, or frozen for up to 2 months.

2 yellow onions, unpeeled, quartered
6 shallots
8 cloves garlic, unpeeled
1 carrot, washed,
brushed and cut in half
six stalks celery, cut in half
2 each parsnips, turnips, rutabagas,
washed, brushed and cut in half
5-6 quarts water
salt and pepper
lemongrass stalk

Preheat an oven to 400!

Spread the vegetables on a baking sheet. Toss lightly with
olive oil, salt and pepper. Place in the oven and roast,
turning the vegetables at least once during cooking, until
the vegetables are well darkened on some surfaces, about
55 minutes, using parchment preserves the pan.

Transfer the vegetables to a large stock pot and fill with
water. Bring barely to a boil, then reduce the heat to low
and simmer uncovered without allowing the water to

bubble, for about 3 hours. Don’t ever boil any stock—the
protein particles will start to separate and fall apart, making
the stock cloudy. The stock should be deeply colored and
very aromatic. Add more water if necessary. Strain through
a fine-mesh sieve into containers. Let cool. Cap tightly,
and refrigerate or freeze.


Feb 22, 2018

DIY - Almond Milk and more

Roasted Chicken
Chicken Stock
Aioli
Almond milk
Ketchup with no sugar

What do these items have in common?
I make them. Especially now, during the Whole 30.

Day 22. According to The Whole 30 habit research, after 66 days this will become a habit. 66 days.

I am committed to the Whole 30 as an elimination diet because I would like to know, once and for all, what, if any, and of course there are many, foods or beverages I ingest that cause or aggravate inflammation.

I have paid lip service to being gluten free for several years, falling off that wagon regularly with some flimsy excuse or other. “I had to make bread for so and so.” “Whosiwhatzit served me a flour tortilla and of course, I had to eat it.” You know. I even heard myself say, “I will just be good. I don’t want any food to become the enemy.”

Right.

I won’t go into the Whole 30 (visit their website, buy the books) but when I checked it out, I knew it was for me. A little heavy on meat for the 30 days, and I don’t care what they say, drinking coffee black IS hard, no not hard like birthing a baby, but the program made sense.

So far? Shortest version is, chronic pain is reduced substantially, I am sleeping better, my heart does not pound at night, I do not need the pillow between my legs at night to relive the pain in my back.

Enough said about all that.

Today’s Added Value: Almond Milk

Almond Milk is so easy, it’s ridiculous. Don’t buy almond milk, and if you do, read the labels. Almonds are often not even a primary ingredient.

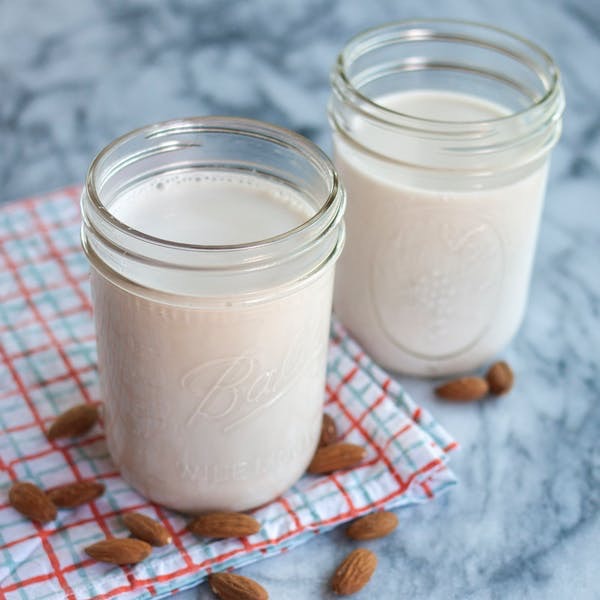
Pour two cups raw, whole organic almonds into a bowl and cover them with filtered water. Cover the bowl with cheesecloth and let stand at room temperature overnight. Drain and rinse the almonds and in batches, run them through the blender with equal amounts of water. The less water you use, the richer the milk. Pour the batches into a nut milk bag (available at most organic markets) and squeeze like you’re building your pecs.

Really. Too easy for words.

Almond milk keeps about four days.

Feb 19, 2018

A Lampshade


In the back of a studio closet lives a large, trendy shopping bag of elegant, mostly never-worn clothes, passed on to me by a friend for quilting. The bag pulses with treasures: embroidered silks and shimmery jackets, voluminous wrap around silk pants that unfold to four yards of fluttering fabric.

The muse took me to the closet. La Muse loves closets. There are so many boxes to stir up in there. I was writing a post about making ketchup without sugar and she grabbed me by the collar and reminded me of a lampshade frame in that same closet, just calling out for a makeover. Why then? I don’t know.

My eyes lit on a blouse of blue/purple/red shantung silk embroidered around the neck and down the front with flowers and tiny sequins.


Before I knew it, the silk was ironed, the panel templates were made and my scissors were gliding through the fabric just as if I knew what I was doing. 12 panel strips cut and glued onto the wire frame and grosgrain ribbon hides the seams.


Next step is to let La Muse tell me where and how to apply the embroidery pieces. Stay tuned.


Dec 21, 2017

Studio 12b - Horsie


My friend, Sampson, built this rocking horse on the left for Danielle when she was a baby. It had been repainted several times. It had some pretty straggley black yarn for a mane and Horsie had fierce un-horsie eyes.

Now grown up, with her own baby on the way, Danielle's family commissioned me to restore Horsie to its glory.

I gave Horsie new eyes, a mane of real horse hair, a lovely dappled paint job and tried to rename him Happy the Appy. I believe the family still calls him Horsie.

Renamed Happy the Appy

Dec 20, 2017

Studio #12 - The Cottage


In the 7990 Cottage, the Give Someone You Love the Boot series was born, short-lived because I needed David’s help pouring the three gallons of slip into the gigantic boot mold and pouring the excess out of the mold.

The mold came with its own simple design. During the greenware stage, I sanded off the original designs and built more satisfying creations. I boldly posted my designs on my website, not imagining an order of 25 to a country club in Hawaii for a western-themed event. The boots were the prizes awarded.