Showing posts with label shoji screens. Show all posts

Feb 23, 2019

Sculpting Polymer Clay Buddhas #2


Just Buddha's Head.


In the interest of keeping my self-imposed sculpting lessons simple, I scrunched up a ball of foil and rolled out some clay to cover it for a head. (I learned the hard way not to bake any polymer clay thicker than about 1/4 inch; it takes forever, you're never quite sure if it's baked all the way through and it smells if it gets scorched.)

I stuck a quilter's straight pin into a cork for something to hold onto. I scrunched the foil head down over the pin with a dollop of hot glue. With a small ball of clay, I pressed out a disk to cover the foil and form a head, making it slightly oval in shape.


I marked the lines for eye, nose, lips and chin, and made about 24 little pieces for these additions.


Polymer clay is so forgiving. After its warmed up (conditioned) it stay supple for a long time an can be worked over and over again before it is baked.


These eye sockets turned out to be a bit much. The instructions called for little clay eyeballs, but I toned them down with Tibetan slits for eyes.

The facial features on my first Buddha turned out a little exaggerated; next time I'll make my tiny body part pieces tinier.

Not bad for a rank beginner.

Jun 25, 2018

Jun 22, 2018

Printable Fabric


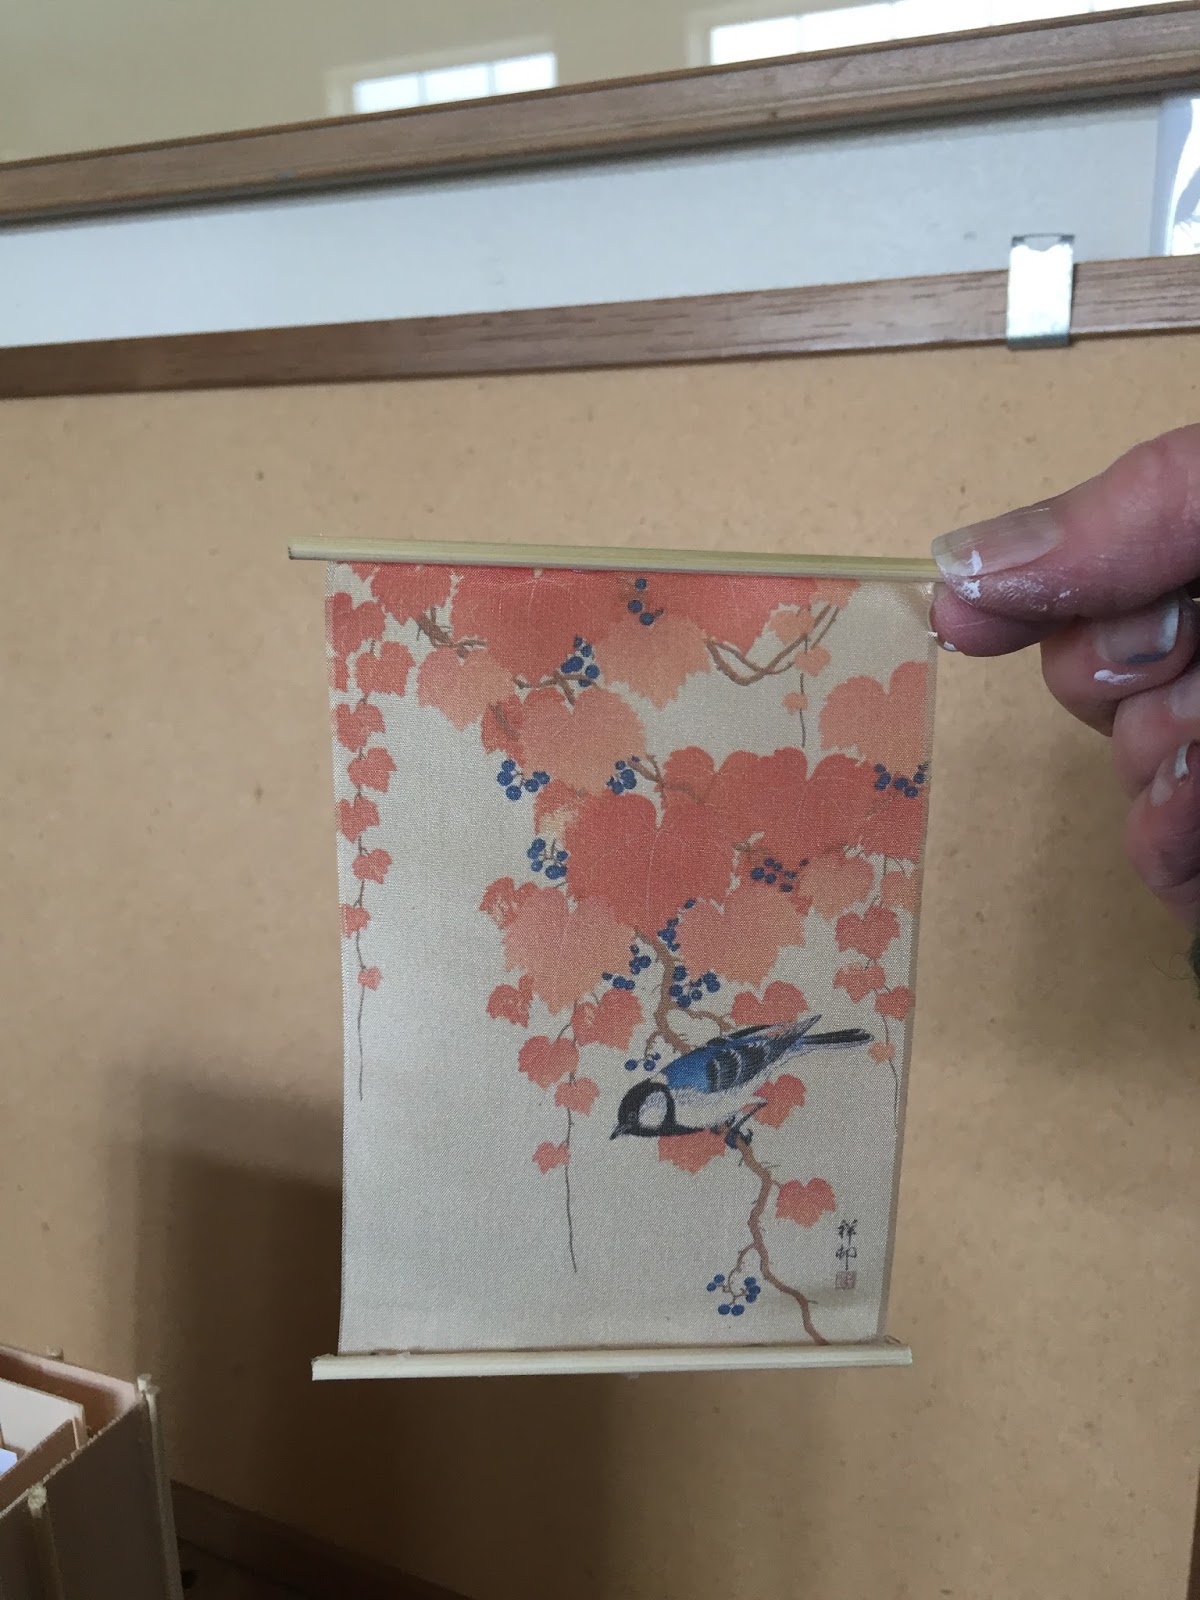
 Leftover from another project, I have packets of 8.5x11 sheets of printable fabric from Dharma Trading Co. in San Rafael, California: several grades of cotton, muslin and silk. These banners were printed on Haboti silk for tiny scrolls.


I am already imagining the tiny prayer flags fluttering on the Tibetan Buddhist Shrine.


Jun 18, 2018

The First Shrine #6

It's amazing, when those inspired moments happen and you just know you have the right tools, ingredients and materials for a particular project.

The first funky teahouse, built with single walls out of popcicle sticks and cut with scissors and an Xacto knife, looks exactly that funky. It's so funky, David made me take one of the pictures down.

Thanks to better tools (the tiny Xacto miter box and three tiny saws), better materials (tiny Basswood and Balsawood lumber), not to mention a higher skill level (the artist having discovered double wall construction in small scale building), my Zen Shrine has stability.

I discovered that tracing paper makes a good substitute for rice paper and I can print bamboo on it with my Canon printer. This was a magical moment - when I realized I did not have to dig out my Sumi-e painting tools and grind some ink in order to get the bamboo effect on those shoji screens. I also printed tiny silk banners on Dharma Trading Co.
printable, paper-backed Haboti silk. More about that in the next post.

There is a lot of trim still to do, a see-through roof (perhaps with a glass skylight for better interior viewing) and a little tiny paint job on that platter and the lantern.

Overall, I am happy with the tiny Zen Shrine, so far.


Jun 12, 2018

First Shrine #5

 I originally planned to have sliding shoji screen doors, like in the Japanese Teahouse, but decided to fix the walls and to keep the visibility to the inside open - once the roof goes on, the inside will be much leas visible.

In building this structure, I keep in mind Tassajara Zen Center, where I first studied Zen meditation in 1972 and bought one of the first spiritual books of my collection, Zen Mind, Beginner's Mind, by the founder of the Zen Center, Shunryu Suzuki, which I am reading again now.

At Tassajara, the rooms and meditation hall are simple, clean and free is distractions.


Jun 8, 2018

The First Shrine #4

 In building the first practice piece, when I copied the YouTube Video about how to build a Japanese Teahouse by AkameruKawaii, the first thing I learned was: I did not want to build my shrines out of popcicle sticks and coffee stirrers.

After a disastrous attempt at staining popcicle sticks with red ink, which warped the tiny "boards" and made my next little practice structure look more like an outhouse than a place of contemplation and solace, I watched a wonderful video of a contractor building a 1/12 scale model of his home. His model covered a 4x8 foot piece of plywood, very impressive. I built a practice piece using double wall construction.

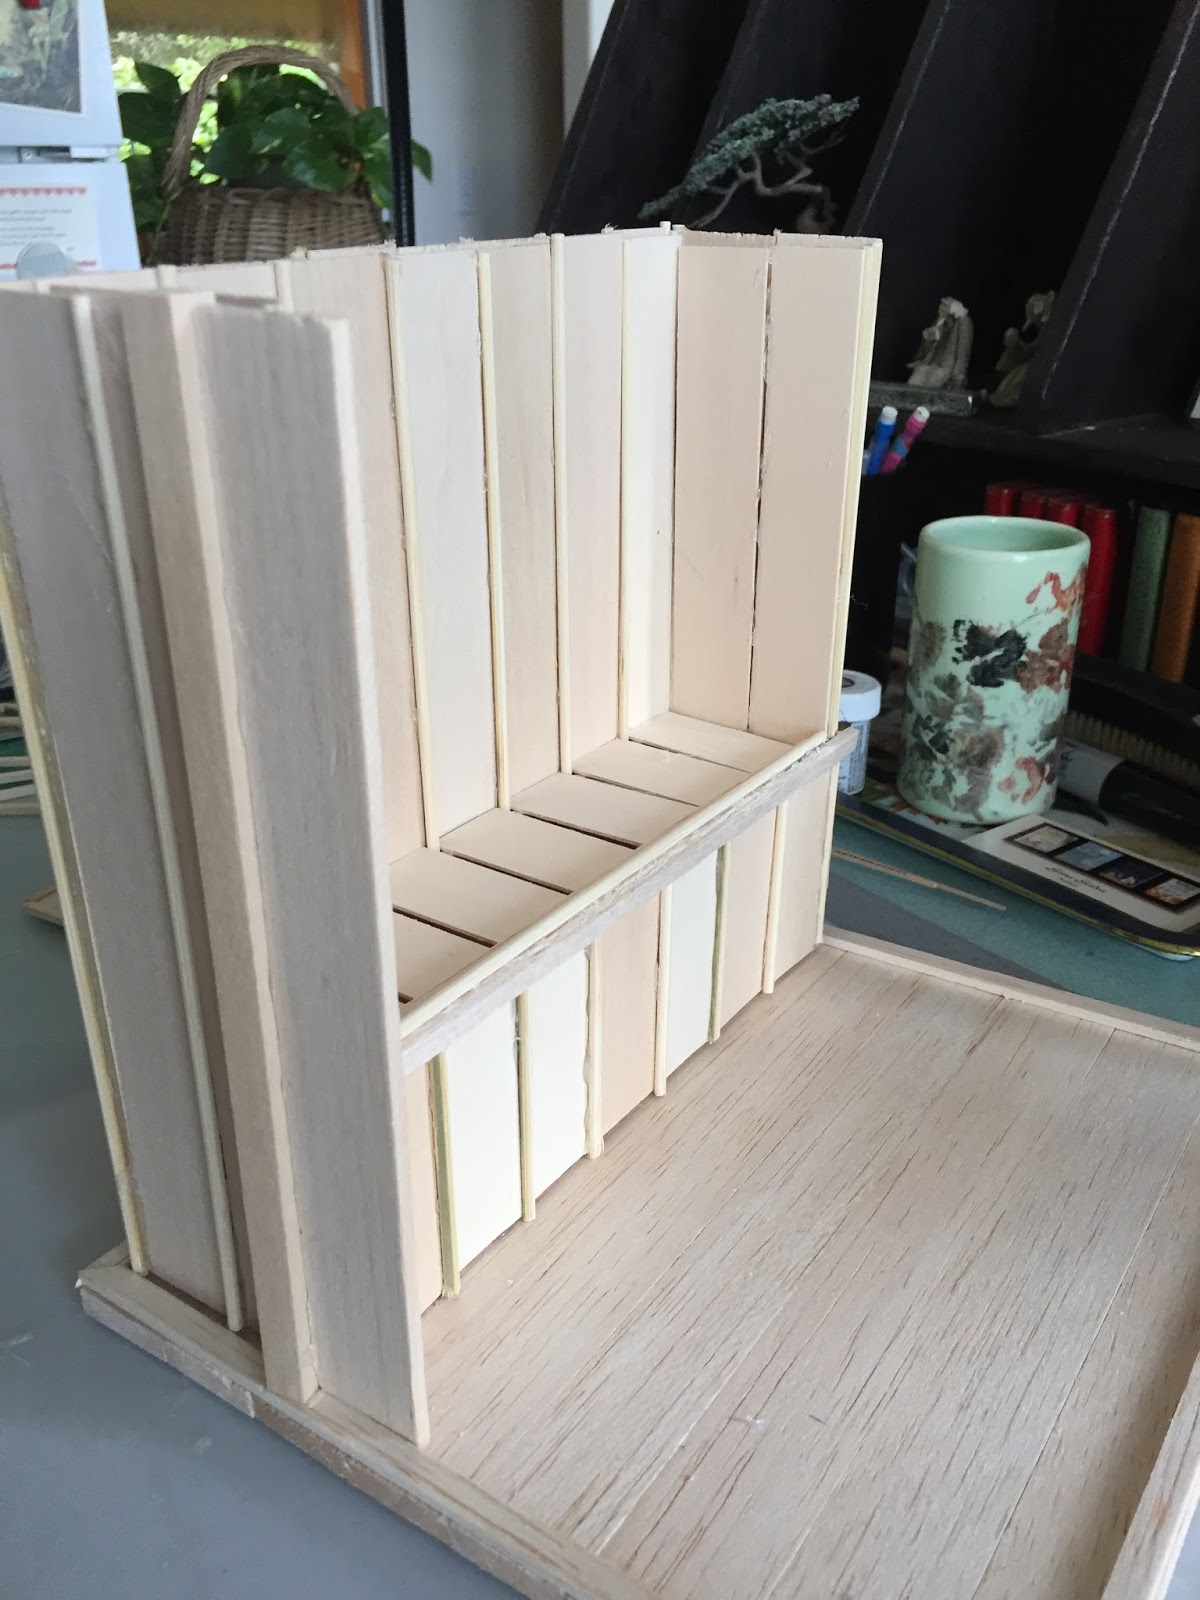
The first real piece in the series, the Zen Shrine, is underway. Here are the shoji walls under construction. Instead of popcicle sticks and coffee stirrers, I have developed a tiny lumberyard. Here I have tiny boards, trim and bamboo skewers (which I thought were OK, considering this is a Japanese Shrine).
 
Instead of a backroom for a teahouse, I built a tiny altar. Now, the wall are going up, which will be lined in "rice paper" painted in a bamboo motif (actually tracing paper on which I printed a black bamboo image).


Jun 4, 2018

The First Shrine #3


 In this first picture, I have just added the trim board that will hold up the altar shelf surface. I used craft sticks for the shelf and trimmed everything in skewers, which can be used as tiny dowels. It is a very simple design, very Zen, I think.

Meanwhile, I made a series of little terra cotta platters and bowls for both this shrine and the Shaman's Tipi. The platters will be painted in the style of each culture. Notice the tiny lantern on the right.

Next will be the six little shoji screen walls that create the room around the altar.

May 29, 2018

The First Shrine #2

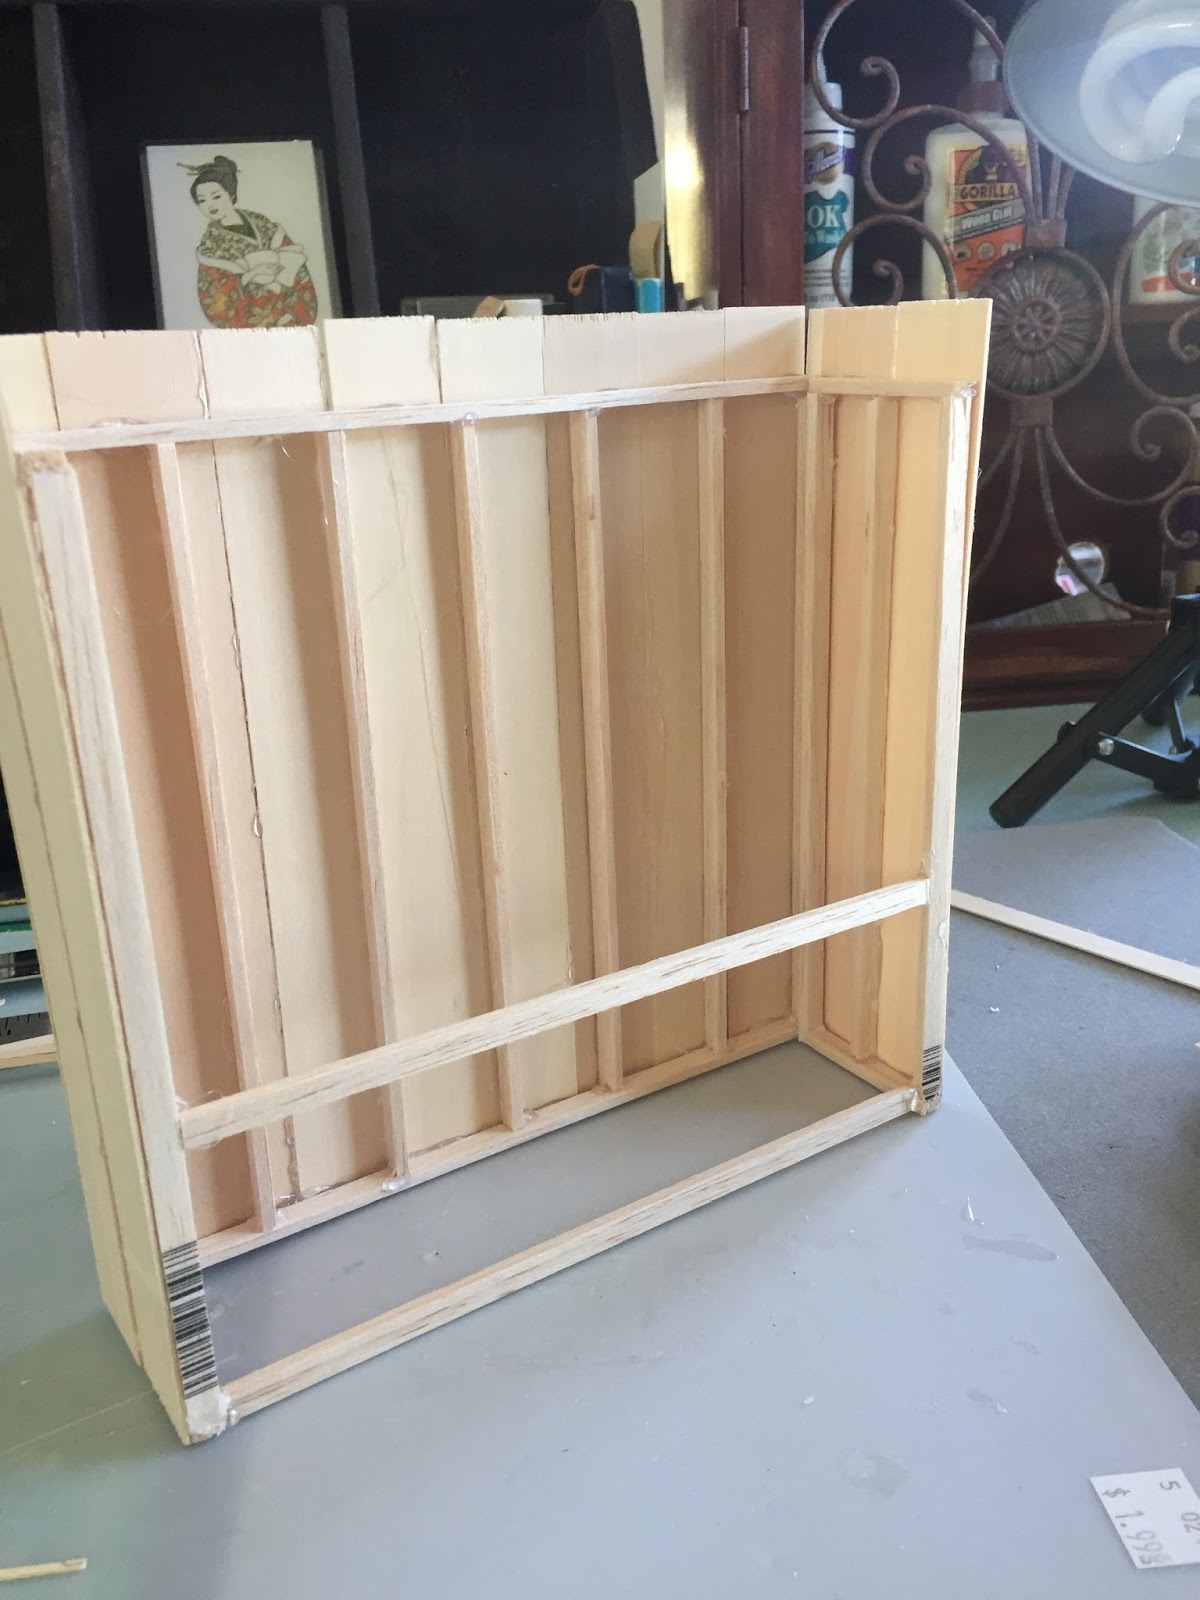
I am learning to think in layers of tiny lumber, like Basswood trimmed in skewers on the inside and outside of this shrine. The "studs" are Balsa wood, 1/16x1/4 inch.

When I first started the project, I slathered Elmer's glue on everything and waited for it to dry overnight before going on to the next step. Yawn.


I pondered why the videos and tutorials used Elmer's or wood glue and not hot glue which dries in a flash and reasoned that the hot glue was a bit uncontrollable for tiny gluing. But, this did not stop me.


I used my hot glue gun to put together this altar. What a difference. It went together in no time, is very sturdy, and allows me to keep going when I am on a tiny building roll and ready to finish the piece. It takes patience and finesse to keep from applying too much of a good thing but it is instant gratification.


May 22, 2018

Making Stuff - Planning a Shaman's Tipi

 These plans for a Plains Indian tipi are printed across twelve 8.5x11 sheets of paper to make the tipi below at 1/24 scale. The interior is about 10 inches in diameter and the cone top is at about 15 inches. Notice how the front slopes, which is part of the elegant design to keep the smoke (emanating from the fire pit in the middle) moving up and out of the smoke holes at the top.

The opportunities for making tiny things for a weenie tipi are endless, so endless, it kept me awake last night until I surrendered, turned on the light and scribbled all this down.

Here my list of items to make for the Shaman's Tipi:
cover
liner
threading pins
arrows
stack of wood
fire pit
rug - woven or felt
bed - fur (fake)
beaded bag
talking stick
pillows
blanket (woven or knitted)
back rests
walking stick
baskets
clay bowls
pots/hanging kettle
rattle
drum
pipe
smudge fan
sage wand
canoe

Of course, a canoe. Any self-respecting shaman would have his own canoe.

May 18, 2018

Getting the scale right....


 On the right are different sizes of paper tipis constructed while finding the proper scale dimensions.

1/24 means two feet per inch. I said this in an earlier post, but it's worth repeating that when we built Faerie Junction a year ago, the motto was, "Scale? Haha. Who cares? It's faeries! Just make it small."

With this project, I am inclined toward accuracy. Accuracy not only in the dimensions of the temples and shrines, but also with regard to the creation of the tiny tools and paraphernalia of devotion.

Watching glue dry causes a "get-it-done-now" girl much frustration. And, although my hobby motto is "No Hurry," I have chosen three very different cultural. i.e., devotional habitats to create in miniature to relieve me of boring drying time: the Shaman's Tipi, a Japanese Shrine and a Rose Window Screen.

Why these three, you might ask, when there is such a vast array of deities and devotions out there from which to choose? Here's why:

I have a small degree of Cherokee blood in my history. Even before I knew this, I constructed and lived in a tipi for two years while working at Rainbow Ranch in the early 90s. My tipi was 400 "square feet" of holy space: a place of refuge for the retreat cook making three meals a day. There is something special about living in that almost round structure. I slept well, meditated better and made pretty beaded jewelry at my little tabletop sitting on crates on the floor. (Read more about that in a post about Kitchens and chef-ing.)

After I left Rainbow Ranch, the owner was none to happy with my donation of the tipi to the center, since it wreaked a bit of havoc by blowing into a tree in a storm. However, my memories of it are clear. And for me, the tipi of a shaman would be a holy place.

If I have lived before, I have surely been Japanese. Long ago, when wondering why I put with with a rude design client who walked in front of me, I suddenly saw him as a 16th century Japanese Warrior, and I his wife, three paces behind. True or not, I honor Japanese design as well as the quiet calm of their devotions. Not to mention the most interesting roof lines.

The Rose Window? I love the rose window.

Three very different cultures and projects. But, imagine the tiny tools? More on that, next post.

Watch these grow into something! GB


May 12, 2018

Tiny Double Wall Construction #3


 When cutting the siding for this little model, I overlapped the edge about 1/4 inch to make the siding meet at the edges of the box. The windows are trimmed inside and out. I added a tidy and stabilizing trim to each corner. The trim boards are 1/4 inch taller than the walls in order to hold the roof, which will eventually be made when I figure out just what it is I've built here.

Is it a Japanese Temple? Is is a Presbyterian Church in Tokyo? Is is a tower in an English woods?


May 9, 2018

Tiny Double Wall Construction #2

I traced out the wall covering on quilters' cotton fabric and glued it to all the posts, covering the individual walls. I added interior window frames before gluing the box together.

I continually amuse myself by the mix and match of cultures and materials as I study this project, trying to make sense out of my Vision.* The first tea house was fine, and I loved the little sliding shoji screen doors that actually slide, but the second attempt in red looks more like a barn than a Japanese shrine. And, the "stain" warped the craft sticks, so it's beginning now to look like a red outhouse in the backwoods of my home town.

In this one, I am using Japanese fabrics on the inside while the outside is beginning to look like a 1920s protestant church. Would that be clapboard?

It doesn't matter. What I am learning about is  structure. As I construct these models, The Vision continues to build in my mind.*

The miter box and tiny saw are essential for making these window frames, even though it takes patience to cut the soft wood without chewing it up. It takes more patience to wait out the gluing process.

*As you might recall,  The Vision began with some scraps of fabric. I thought they'd make a cute little curtain in a miniature Japanese Tea House. This turned out to be true.

However, what was also true was the rest of The Vision which continues to grow.

I find the materials easier to handle and definitely cleaner than dealing with gourds, which you have to grow, dry, clean and cut, and gourd dust is nasty and toxic. These sweet soft woods, on which I can use many of the tiny gourd tools, are very satisfying materials.

Which leads me back to The Vision. The very fact that I love the materials leads The Vision on, with various names throughout the process, from Shrines for Humanity to Shrines to the Divine. So far I have seen a tiny Shaman's Tipi, an Ornate Mosque, a Humble Chapel in the Woods, An Episcopal Steeple, A Shiva Shrine, A Tibetan Temple.

I don't know where this will take me, but the journey certainly is fun. Pack a basket, bring the wine. We're on a road trip.


Apr 19, 2018

Making Stuff - Japanese Teahouse #6

To make this roof I used craft or popsicle sticks, large and jumbo. Even with a tiny miter box it is hard to make perfect cuts. Balsa is so soft it kind of crumbles on the ends. And Basswood needs a surprising amount of muscle.
As you can see by the pile of debris, tiny slices are the way to go. Carving tiny sticks to create joists takes patience, good motor skills and very sharp blades. It is also a testament to my hobby motto, "No Hurry."  Waiting for glue to dry is like watching grass grow. Or watching someone play golf. Soon I'll need two projects going at the same time to ease my frustration. Once my mind gets on an idea, the fingers become like little machines, ready to go - tiny tools, yee haw!

I altered the final roof line and materials. The tutorial called for a piece of fake leather to simulate the roof, but since my joins weren't exactly straight, I thought they might be hidden better with a wood rooftop.


The roof will not be glued down and will just sit on top of the structure, so if the mood strikes to make interior detail, it can be approached from above and not through the sliding doors. 


Apr 16, 2018

Making Stuff - Japanese Teahouse #5

 I found these tools while assembling my "Temples, Shrines & Teahouses" Kit. My husband David's father was a golf course architect, therefore collected these sets of marvelous tools. I don't even know what to do with most of the Xacto blades, still very sharp, but I love the set and the little blue box. And the carving tools on the right are overkill for Basswood and Balsa, but I love to look at them.

A regular Xacto blade will work for a carving tool when your medium is craft or popsicle sticks and Balsa wood so soft you could sculpt it with your fingernails.

Today I carved the pieces for the roof line. Each one has to be an absolute exact duplicate of the other or the roof will not fit squarely together. (The very accomplished artist's YouTube Tutorial I have watched about fifty times showed glueing the whole thing together with coffee stir sticks, but tiny trim board is more reliably straight.)


Apr 15, 2018

Making Stuff - Japanese Teahouse #4

 Wow! I forgot how wonderful and fun it is to have little Xacto saws and a tiny miter box to use on Basswood and Balsa. Thanks to David for hunting them down. Now the tiny architecture and carpentry can move up a notch.

After creating the doors I made little troughs in which they could slide and glued them to the corner posts. The fabric that started this whole project, the quilters' cotton pieces with excellent tiny Japanese designs, was cut to make a curtain for the back room. All this trouble and precision just to hang that little curtain.
I made a little rod out of a skewer, punched holes in the curtain top, slid it all together and glued the rod to two pieces of trim wood.

 Next I'll be working on the roof.

Each part of the structure has to be measured and cut along the way. It's too late now, but I should have stained the "wood," but I would be sure to screw up the shoji screens if I did it now. For my next teahouse, I might choose all the wood materials and stain them red before I begin.

Ha ha ha. Red. Of course!

 All of this is reminiscent of the Gingerbread Farm I built in 2011, according to no scale at all - just another one of those projects that started out as an idea and went berserk!

Here it is below in progress. Note the toasted and dyed green coconut for the lawn, the pile of marzipan pumpkins, the pretzel chicken house, pretzel wood pile. Pretty proud of those two little marzipan doggies and the flock of chicks, too. The red door  on the main house is marzipan, too.
um