Showing posts with label Knitting. Show all posts

Feb 23, 2019

Sculpting Polymer Clay Buddhas #2


Just Buddha's Head.


In the interest of keeping my self-imposed sculpting lessons simple, I scrunched up a ball of foil and rolled out some clay to cover it for a head. (I learned the hard way not to bake any polymer clay thicker than about 1/4 inch; it takes forever, you're never quite sure if it's baked all the way through and it smells if it gets scorched.)

I stuck a quilter's straight pin into a cork for something to hold onto. I scrunched the foil head down over the pin with a dollop of hot glue. With a small ball of clay, I pressed out a disk to cover the foil and form a head, making it slightly oval in shape.


I marked the lines for eye, nose, lips and chin, and made about 24 little pieces for these additions.


Polymer clay is so forgiving. After its warmed up (conditioned) it stay supple for a long time an can be worked over and over again before it is baked.


These eye sockets turned out to be a bit much. The instructions called for little clay eyeballs, but I toned them down with Tibetan slits for eyes.

The facial features on my first Buddha turned out a little exaggerated; next time I'll make my tiny body part pieces tinier.

Not bad for a rank beginner.

Feb 19, 2019

Tibetan Temple #3

I rediscovered polymer clay after a 20 year hiatus. Back in the early 90s, I made beads and pins and jewelry items.

This time around, I had in mind the tiny lumberyard and all my little itty bitty constructions. For the Zendo, I formed a little platter, a bowl and a vase. In the midst of the experiments, I fell in love again with this versatile medium. There are a bunch of useless polymer items around my studio right now,  a giant red flower, some art deco pillars, on the way to making tiny creations for the Tibetan Temple:

Here is the tiny tile floor, made from a large sheet of polymer clay, conditioned and rolled out to accommodate my 7x7 inch plan. After baking, I cut out the corner tiles to make room for the 1x1 inch pillars.

The wood base for the temple is three sheets of basswood glued together and framed in around the tiles.

I was attracted to Buddhist teachings because of the three essentials: (a) ethical conduct, (b) mental discipline and (c) wisdom. Along the way, I learned about making malas (another post) and painting as a meditation.

While studying Thangka painting, mental discipline was necessary, as was patience with myself and for the slow emergence of anything resembling a Buddha.

This little tile floor will be painted blue, the base stained with red.

The miter box lessons from my son, Michael, come in handy with my tiny tools. I am pretty happy with my corners.

Tulku Jamyang and his wife, Chigme, invited me often to share their Tibetan dinners. It was all very mysterious to me, big bowls of chopped meat, tureens of thick soup, flat breads and sweet pastes and sticky rices. We ate heartily with fat spoons as well as our fingers and drank copious amounts of rich dark tea with coconut butter (no yaks for miles and miles).

When I work out my Tibetan Temple, I remember Tuklu Jamyang's teachings, and translate the sacred geometry into my constructions.

I have become more patient over the years through meditations of all kinds, other art forms, knitting, of course, but the memory of Mondays with Tulku Jamyang, his quiet teachings, his generous spirit, hover around me like a sprite.

As I teach myself to sculpt with polymer clay, I'll make a teacher, a student and a Buddha.


Dec 19, 2018

Pam & Joe's Afghan, Complete

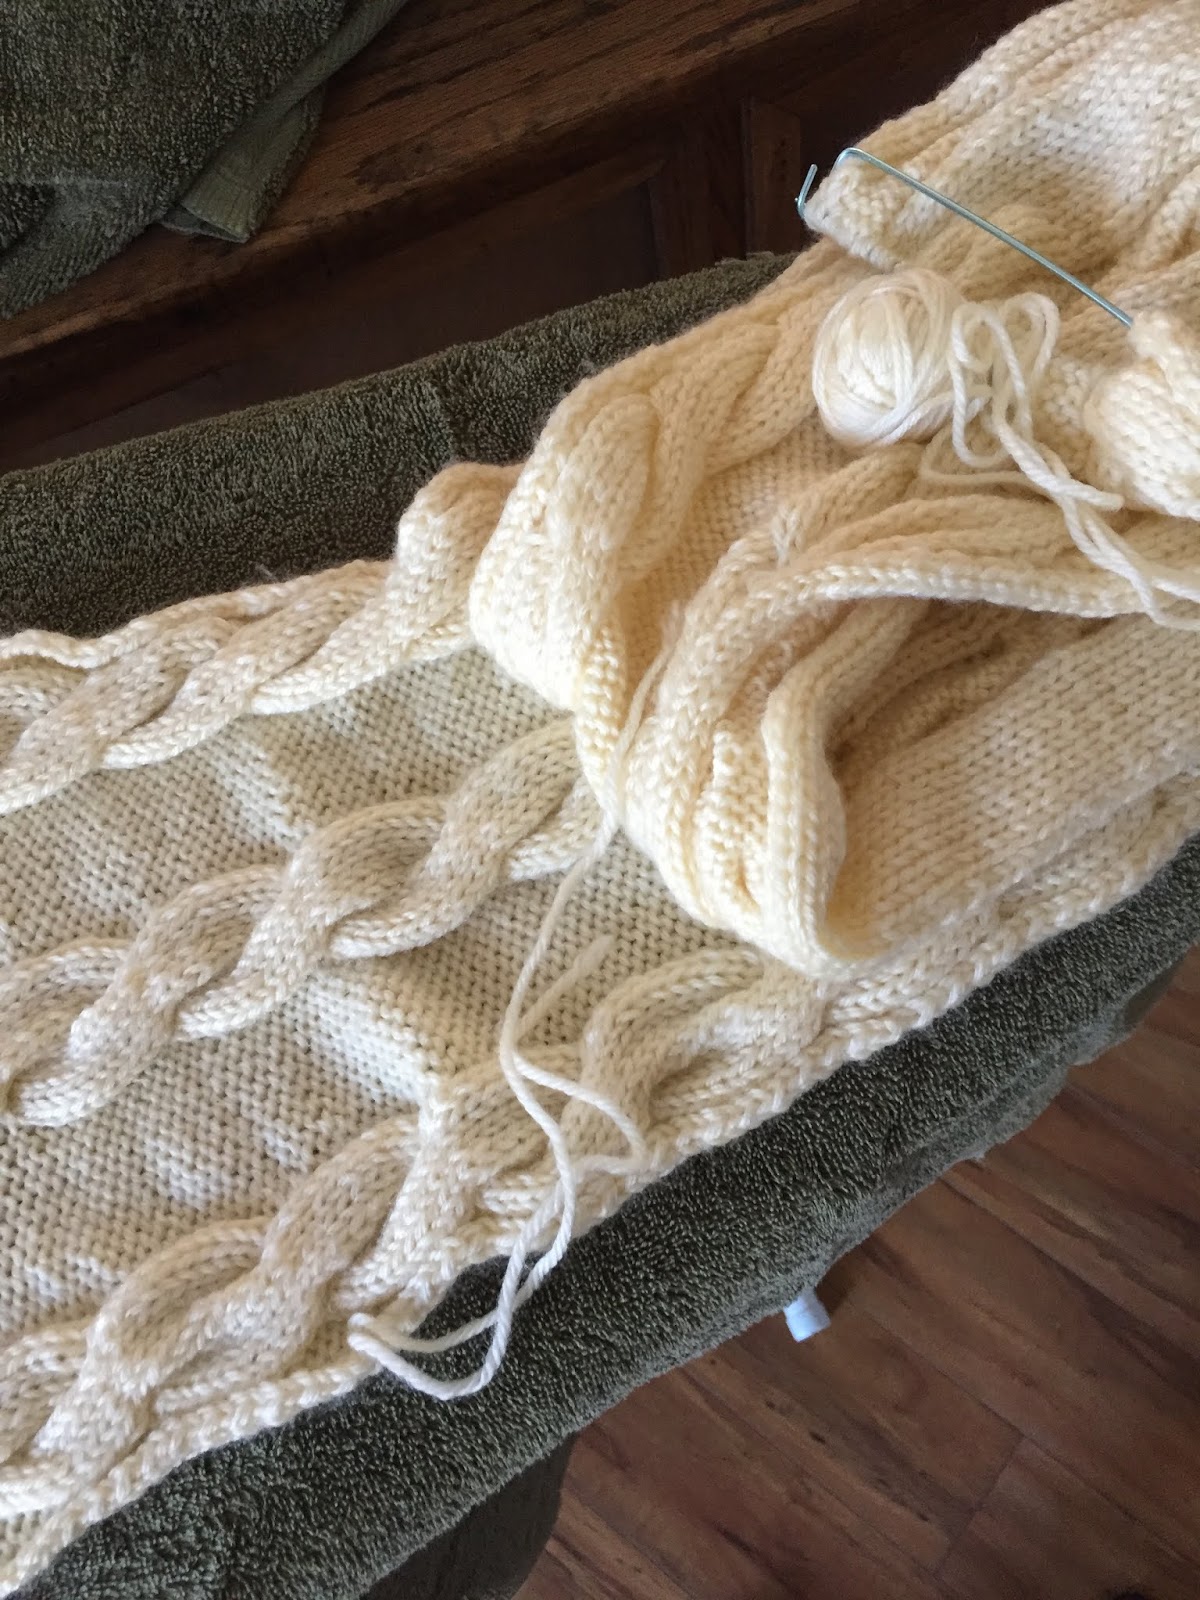
 Making this afghan for my faerie godchildren, Pam & Joe, has been a joy, not to mention the biggest knitting project of my life - on the right.


(Just as an aside, I also just finished the smallest knitting project ever, tiny slides (above left) for a friend with a broken finger who has to keep two fingers taped together. From the ridiculous to the sublime, and I don't know which was which.

Knitting, for me, is a pass-time, with no solid deadlines and very squiggly goals. My craft and knitting hobby motto is "No Hurry," so there is built-in flexibility.

 But this is truly an accomplishment. My husband, David and I calculated the time involved in a project like this. More than 300 hours, and that is just actual knitting time.

I knitted four panels of different colors with cable patterns and some filler panels and then sewed them all together .

The piece got kind of unwieldy (almost 6' x 8'). I went to a friend's studio several times to lay the pieces before sewing them together.


Oct 22, 2018

Wrist Warmers

I am never without a knitting project. I use short, bamboo needles that fit in my purse. I can knit during a meeting, at the coffee house, even at dinner, if it looks like a long evening. I knit in the car, if I don't have to drive.

This time of year I get requests for the wrist warmers pattern, a good pocket or purse project. It's really simple, even fore a beginner. My basic pattern is like this: knit a 6.5 inch square in the pattern of your choice, fold it over, sew up the sides, leaving at 1 1/2 inches open for your thumb, beginning about an inch from the top.

If you use a worsted weight yarn, use size 7 needles and start with 42 stitches. Fingering weight yarn is best on size 5 needles, and for these Rusty Garden Ornament items on the right I cast on 38 stitches.

These sizes are based on a Woman's Medium. You make them wider by casting on more stitches and longer by knitting more rows. 

 You can get fancy with patterns and stitches: dots, hearts, cables... The green warmers above are created with the seed stitch, which is all knit, purl, knit, purl: knitting into the purls and purl into the knits.

I started with ribbing on the red and black item on the needles below and increased one stitch at each end before I started with the Midnight Black for a total of 36 stitches. The ribbing adds a nice touch and creates more of a cuff for the wrist.

One of the joys of these little gift items is how little time they take to make, unless you decide to create a Santa Face or get tricky with other colorways. I like to keep it simple so I can knit and watch a movie, talk with friends, listen to an audio book, but not all at once.


Oct 12, 2018

Afghan Parts

 All the parts for the colorful Afghan are finished, with the exception of 12 feet of 3 inch trim.

Blocking was challenging, but I took care with the steam iron and didn't let it rest on the fibers for very long. I mostly hovered above it, afraid to scorch the few man-made fibers in the yarn.

I draped the panels over a card table while sewing them together. Each panel is 54 inches by 68 inches, so when trimmed and finished, it will be 5 x 7 feet, the biggest knitted item I've ever made.

To the right, the afghan is spread out on tables at my friend, Anne's studio. She was kind enough to let me spread it out flat for measuring. (You can't get much of a measurement while draping it over the bed or a table.)


Aug 31, 2018

Infinity Scarves

 Infinity scarves are so easy to make. Here, I use Sky Ranch Fiber's hand-dyed fingering weight yarn. Midnight is about 50 inches long, and the green, which the designer, Becky Mann calls Autumn (though I prefer Rusty Garden Ornament) is a bit longer. Make a scarf in the yarn and pattern you like up to 55 inches, sew the ends together. Wrap it around your neck once or twice. Seriously.


Aug 20, 2018

Mar 2, 2018

Afghan Stitch Sampler


A book called Pick Your Stitch, Build a Blanket by Doreen L.Marquart inspired me to make this lap robe above. The photo on the left is of the 36 squares stacked and ready to be sewn. The book has 80 different stitch patterns designed to make the same size squares. Very handy. Excellent instructions.

Mar 1, 2018

A Simple Scarf Project

This scarf is a great project for a beginner. It is done with a garter stitch all the way (knit, knit, knit forever) except for a little bit of checkerboard (knit four, purl four) until the right length. Just add on whatever colors you like. I used Merino Extra Superfine washable wool with size 7 needles. I  cast on thirty stitches and made it just long enough to lay comfortably across the chest, by request. It’s a soft, cozy beauty.

Jan 15, 2018

HUGS


Hugs are wrist warmers. Each wrist warmer takes about an hour, depending upon the complexity of the design.

Hugs are simple knitted seven inch squares sewn together. I prefer a Merino Superfine or even Extra Superfine with size 7 needles.

 Here it is: you find your gauge for your needles and yarn and knit a square, with or without a ribbing or pattern. The simplest would be a garter stitch, knitting every row. My preference is a stockinette stitch (Knit a row, purl a row), which makes a smooth and comfortable fit. The edge does curl a bit unless you put in a ribbing, but I kind of like that hobo look.

After you’ve knitted the square, fold it over, right sides together, and sew up the edge, leaving a one and a half inch hole for the thumb about one inch from the top. Turn right side out. Ta. Da. My husband, David, enjoyed a thirty year career as an opera singer and, as a troubadour, has many stories of life on and off the stage. Stay with me, here. This IS about Hugs.

He tells of wearing heavy and padded costumes, some weighing fifteen pounds and the only way to stay cool (since one is often sewn into one’s costume) was to roll back sleeves and hold wrists under icy cold running water. I tried it. Makes sense. You cool the blood there at the wrist and you cool the body.

So,  in the reverse, if you warm the wrists…

Hence, My Hugs.

You’re welcome. Make some Hugs and give them away.

You’ve been Hugged. GB

Jan 1, 2018

Welcome

Welcome to Ginna Gordon 2018
the Diary of a Creative
300-500 Word Articles
Regarding Books, Ideas, Projects, Recipes, Quotes & Pix

My audience:
Boomers, authors, readers, crafters, cooks

My topics:
Books
Writing
GB’s Love Notes
Knitting
Crafts
Food/Recipes
Studios

My 2018 Goals:
Sharing ideas/recipes
Lucky Valley Press

I write about
• scaling down from an 800 square foot space to a basket of knitting and what that feels like after 50 years of large studio spaces wherever I have lived. I share the experience, physically, mentally and spiritually, and find out what other artists do at a certain age when it is no longer appropriate to spin in all directions creating in ten different mediums at once.
• being a writer, about re-writing when I thought the book was finished, about that process, which in the case of Humming, is months and months long: the fallow time of writing, when the characters are taking naps and your mind is filled with the many ways in which you could take the story instead of where you were going.
 • what it feels like to be doing the best work of my lifetime, about working with David, about creating in general, about being a creative, about being created.
• I’ll post recipes, knitting projects, stories, quotes, anecdotes about a client, book covers.
My blog wraps my creativity up in a package and shares it with the world.

Dec 10, 2017

Studio on the Move

About the time I stepped into the Orchard studio in Ojai, my attentions got diverted to LA, where I signed up for the UCLA Design Program. Classes in the arts of Trompe l’oeil, Shiburi dying and surface design (and a little dip back into commercial acting) took me all over downtown LA to various teacher’s studios (and several theaters).

I divided my time between Ojai and LA for the next three years, transformed the kitchens of my two borrowed apartments into temporary art spaces (one in Santa Monica and one in the fancy shmancy apartments in Marina Del Rey) until I rented a friend’s guesthouse in Culver City, where I could prepare my artsy homework and rehearse for acting classes unseen and unheard.

Three years! What was I thinking? Compared to my life now (where I walk to the grocery store and post office and take the car out twice a week), I was in Hell - on and off the freeway all day, stuck in traffic on Highway 10 at 11pm, looking for places to park ad nauseum. Schlepping art materials and paraphernalia up stairs and into elevators and down escalators. Driving back and forth to Ojai for long weekends, busy busy, and then back to LA for three days of classes.

On those long weekends, I reveled in my Orchard, sucked in the rarified orangey air. I drew ideas in the dirt with a stick. John Denver crooned in my ear, reminding me… just reminding me.

On an eleven day “Burro Trip” in the high Sierra with the Headmaster of Thacher School and 10 other intrepid hikers, I took my drawing pad, a few pencils and a journal and kept a few notes.


I made a Bisquick Apple Cake, buried in two pie tins in the coals of a hot fire, drank out of a tin mug, led burros, hiked trails, ate Toblarone Bars that taste like Heaven on top of a mountain after an all day hike.


Better, to be out on the trail than stuck in LA traffic. GB