Jun 25, 2018

Jun 22, 2018

Printable Fabric


 Leftover from another project, I have packets of 8.5x11 sheets of printable fabric from Dharma Trading Co. in San Rafael, California: several grades of cotton, muslin and silk. These banners were printed on Haboti silk for tiny scrolls.


I am already imagining the tiny prayer flags fluttering on the Tibetan Buddhist Shrine.


Jun 18, 2018

The First Shrine #6

It's amazing, when those inspired moments happen and you just know you have the right tools, ingredients and materials for a particular project.

The first funky teahouse, built with single walls out of popcicle sticks and cut with scissors and an Xacto knife, looks exactly that funky. It's so funky, David made me take one of the pictures down.

Thanks to better tools (the tiny Xacto miter box and three tiny saws), better materials (tiny Basswood and Balsawood lumber), not to mention a higher skill level (the artist having discovered double wall construction in small scale building), my Zen Shrine has stability.

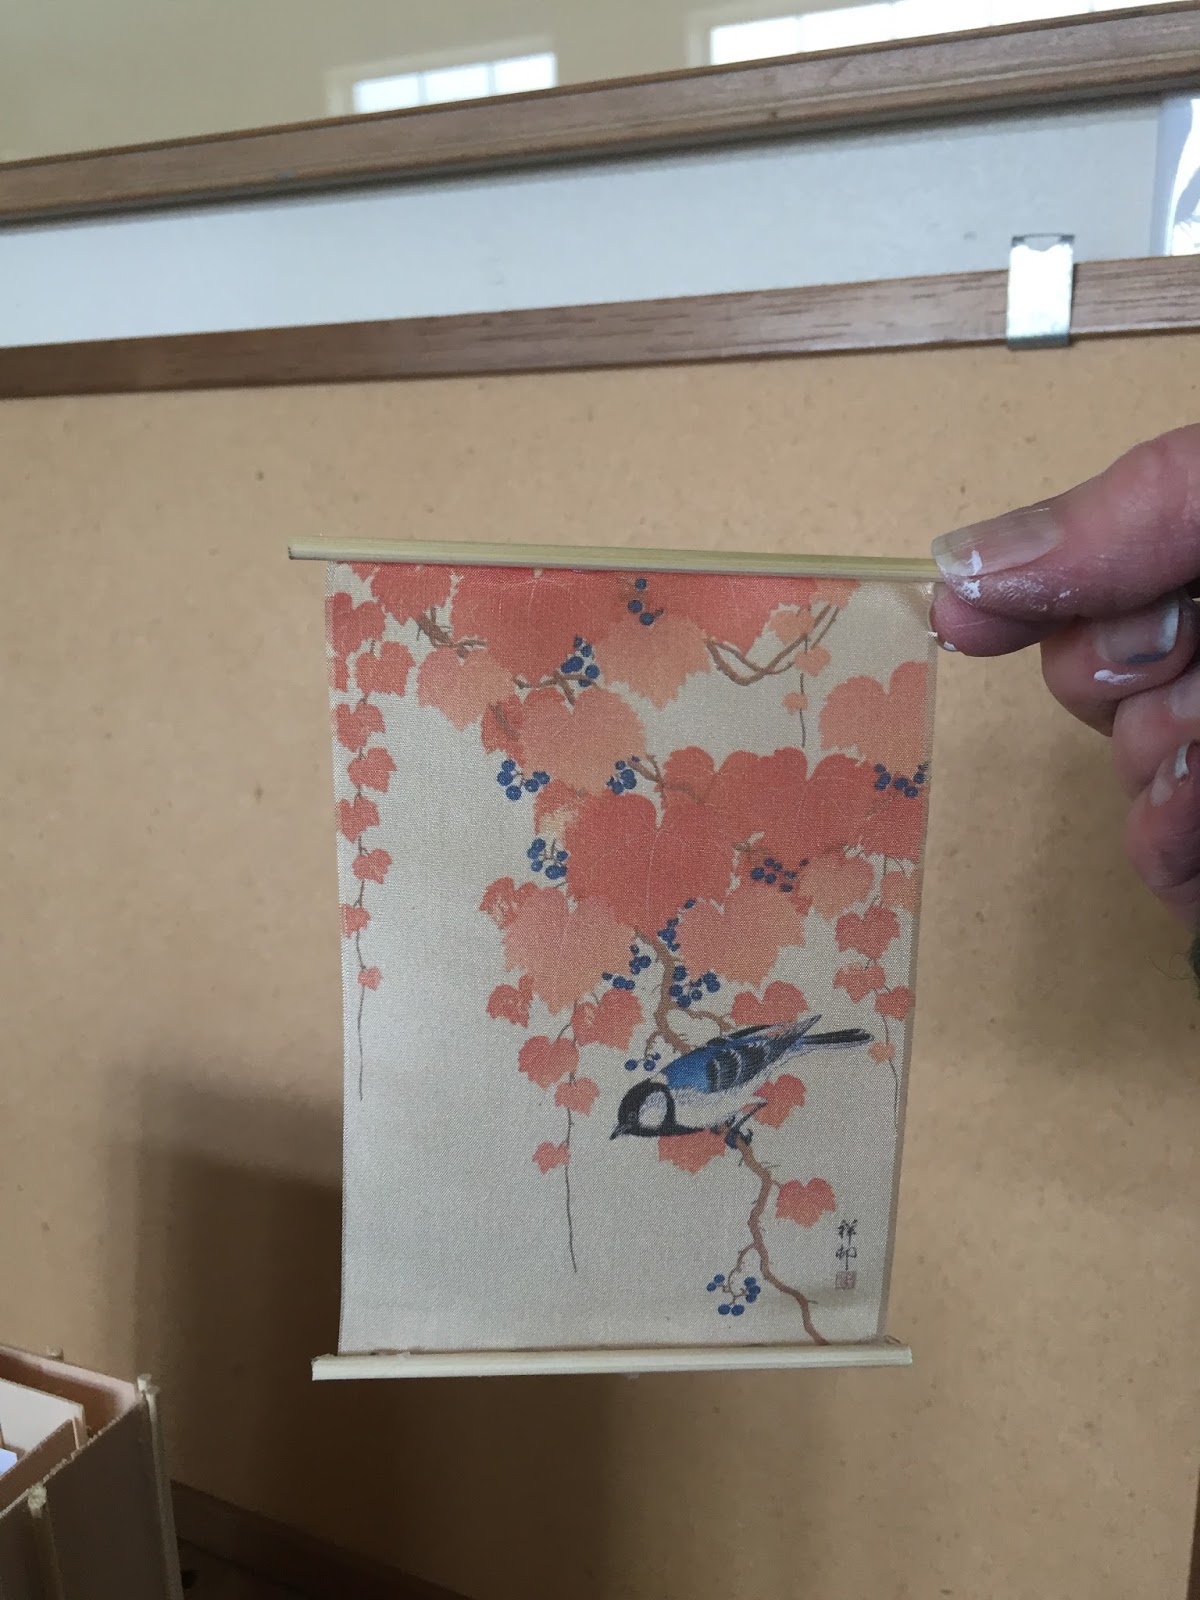
I discovered that tracing paper makes a good substitute for rice paper and I can print bamboo on it with my Canon printer. This was a magical moment - when I realized I did not have to dig out my Sumi-e painting tools and grind some ink in order to get the bamboo effect on those shoji screens. I also printed tiny silk banners on Dharma Trading Co.
printable, paper-backed Haboti silk. More about that in the next post.

There is a lot of trim still to do, a see-through roof (perhaps with a glass skylight for better interior viewing) and a little tiny paint job on that platter and the lantern.

Overall, I am happy with the tiny Zen Shrine, so far.


Jun 12, 2018

First Shrine #5

 I originally planned to have sliding shoji screen doors, like in the Japanese Teahouse, but decided to fix the walls and to keep the visibility to the inside open - once the roof goes on, the inside will be much leas visible.

In building this structure, I keep in mind Tassajara Zen Center, where I first studied Zen meditation in 1972 and bought one of the first spiritual books of my collection, Zen Mind, Beginner's Mind, by the founder of the Zen Center, Shunryu Suzuki, which I am reading again now.

At Tassajara, the rooms and meditation hall are simple, clean and free is distractions.


Jun 8, 2018

The First Shrine #4

 In building the first practice piece, when I copied the YouTube Video about how to build a Japanese Teahouse by AkameruKawaii, the first thing I learned was: I did not want to build my shrines out of popcicle sticks and coffee stirrers.

After a disastrous attempt at staining popcicle sticks with red ink, which warped the tiny "boards" and made my next little practice structure look more like an outhouse than a place of contemplation and solace, I watched a wonderful video of a contractor building a 1/12 scale model of his home. His model covered a 4x8 foot piece of plywood, very impressive. I built a practice piece using double wall construction.

The first real piece in the series, the Zen Shrine, is underway. Here are the shoji walls under construction. Instead of popcicle sticks and coffee stirrers, I have developed a tiny lumberyard. Here I have tiny boards, trim and bamboo skewers (which I thought were OK, considering this is a Japanese Shrine).
 
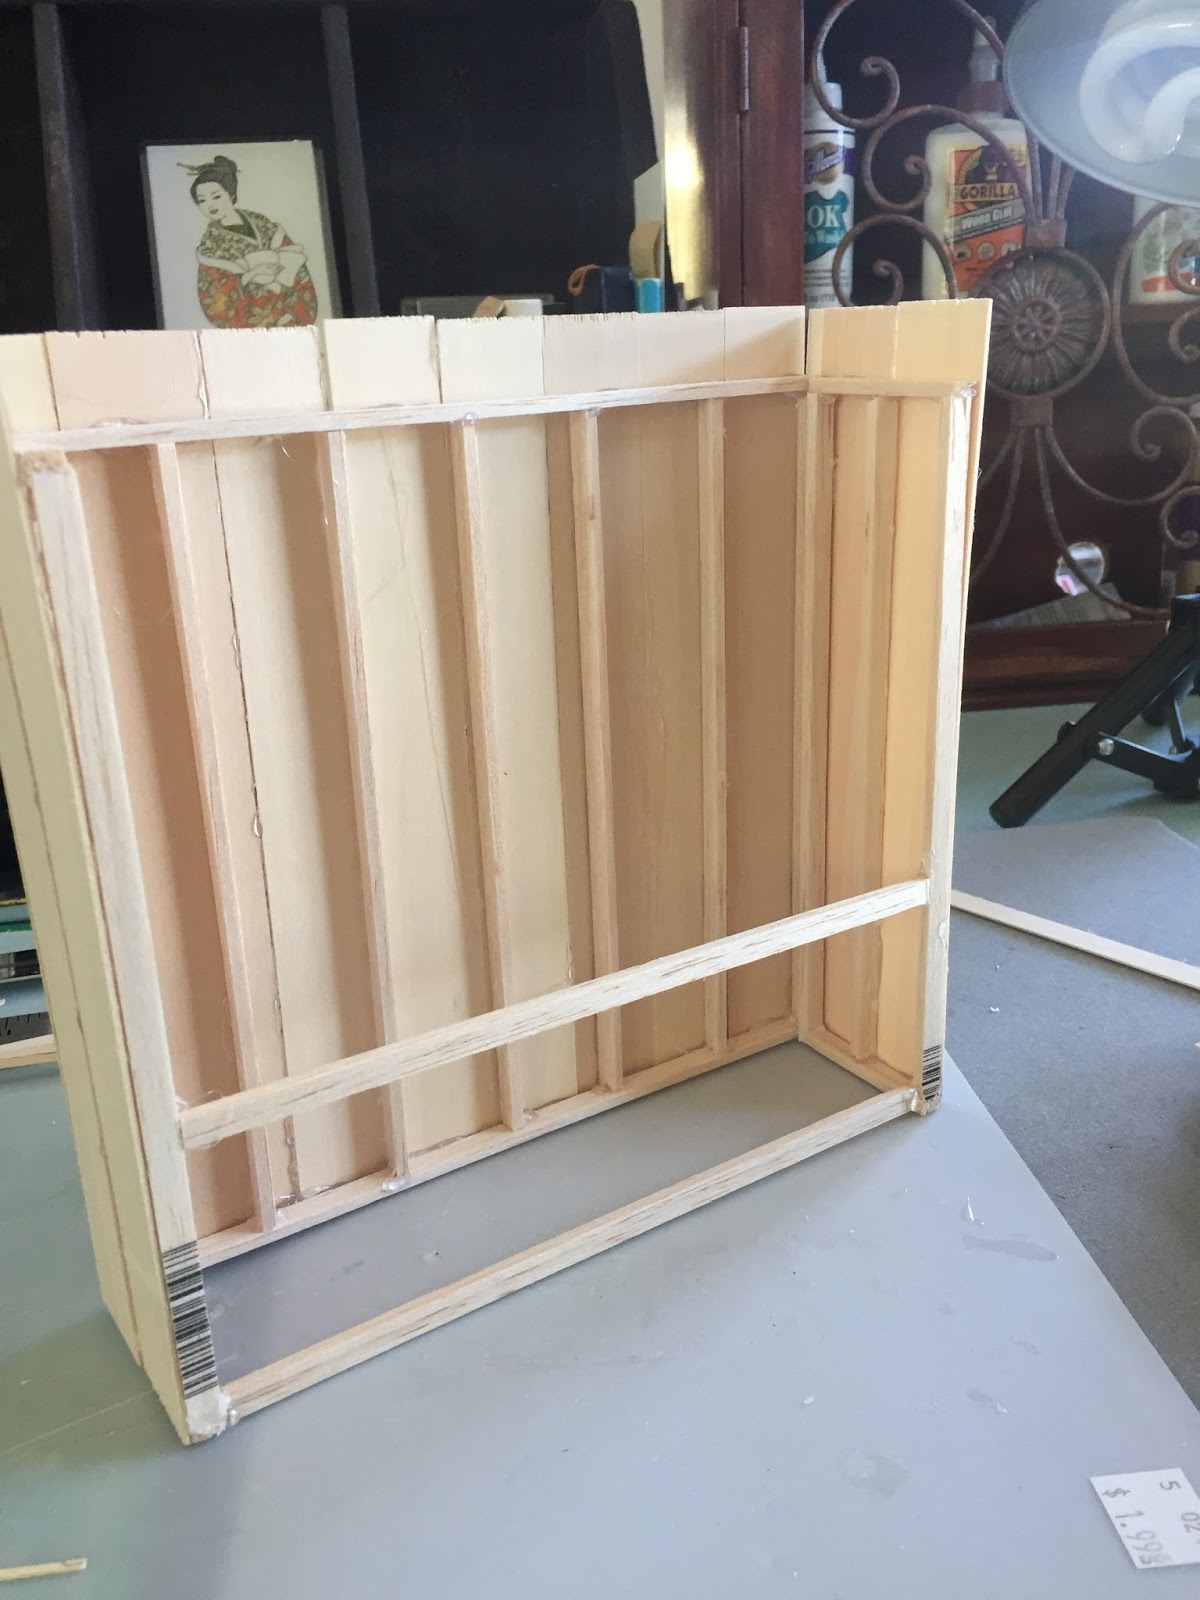
Instead of a backroom for a teahouse, I built a tiny altar. Now, the wall are going up, which will be lined in "rice paper" painted in a bamboo motif (actually tracing paper on which I printed a black bamboo image).
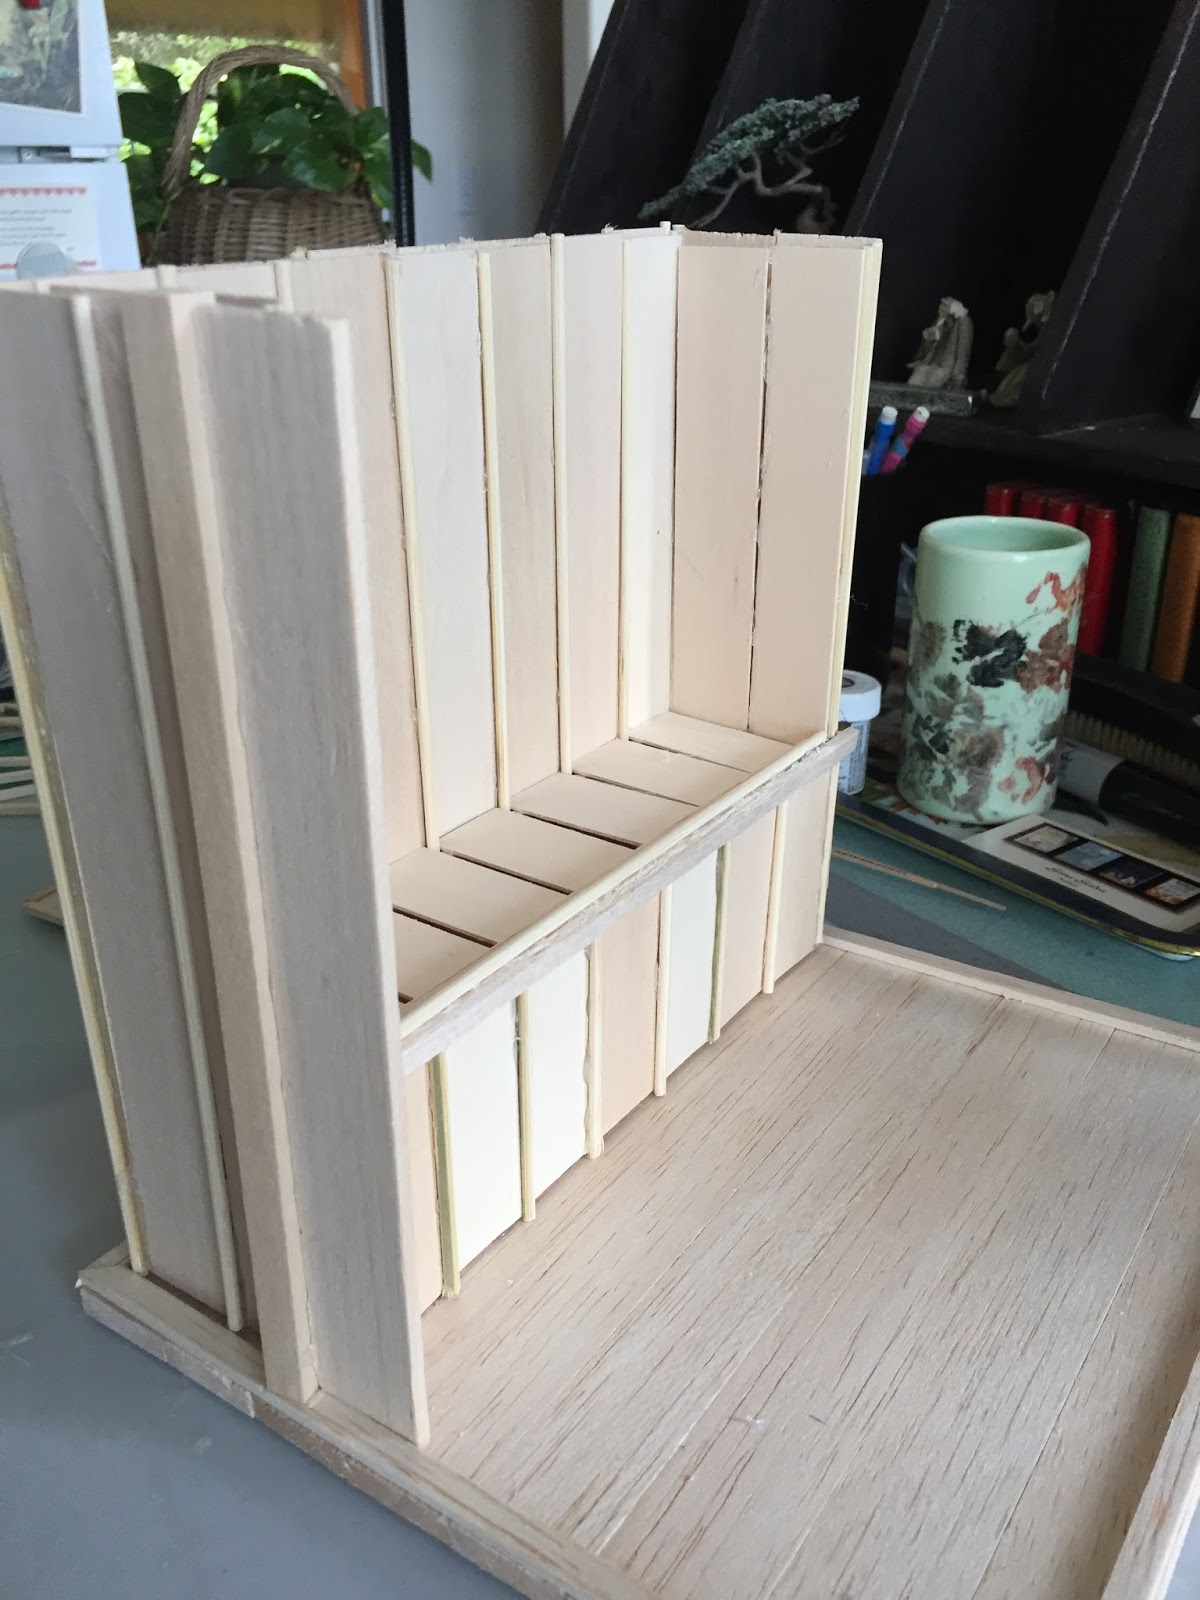


Jun 4, 2018

The First Shrine #3


 In this first picture, I have just added the trim board that will hold up the altar shelf surface. I used craft sticks for the shelf and trimmed everything in skewers, which can be used as tiny dowels. It is a very simple design, very Zen, I think.

Meanwhile, I made a series of little terra cotta platters and bowls for both this shrine and the Shaman's Tipi. The platters will be painted in the style of each culture. Notice the tiny lantern on the right.

Next will be the six little shoji screen walls that create the room around the altar.

May 29, 2018

The First Shrine #2

I am learning to think in layers of tiny lumber, like Basswood trimmed in skewers on the inside and outside of this shrine. The "studs" are Balsa wood, 1/16x1/4 inch.

When I first started the project, I slathered Elmer's glue on everything and waited for it to dry overnight before going on to the next step. Yawn.


I pondered why the videos and tutorials used Elmer's or wood glue and not hot glue which dries in a flash and reasoned that the hot glue was a bit uncontrollable for tiny gluing. But, this did not stop me.


I used my hot glue gun to put together this altar. What a difference. It went together in no time, is very sturdy, and allows me to keep going when I am on a tiny building roll and ready to finish the piece. It takes patience and finesse to keep from applying too much of a good thing but it is instant gratification.